Friday, November 25, 2022

 What is Air Layering?


Air layering is the method involved with eliminating an enormous branch or segment of the storage compartment of a tree to make another tree. Before the branch is taken out it is supported, safeguarded with peat greenery or different media and the supported area is permitted to root. In the wake of establishing the branch is taken out from the tree. This is an extremely normal practice in bonsai to get one more tree from an undesirable branch or to save a thick trunk segment that would have been taken out at any rate.  Knowing how a tree structures roots at an air layer site gives strong data to grasping the cycle, yet additionally a vehicle for responding to your own inquiries and tackling your own concerns in air layering.

Transport of Food, Water, and Supplements

Under the bark of trees (dicotyledonous ones) there is a layer of cells called the phloem. This tissue transports carbs and other photosynthates (counting auxin) down from the passes on to the lower portions of the plant. Underneath the phloem layer is another layer called the xylem that transports water and mineral supplements from the roots and soil up to the verdant pieces of the tree. Underneath the xylem is another xylem layer called the optional xylem. These xylem layers are thicker and more profound into the wood of the tree than the phloem layer. Lying on top of these layers simply under the bark is a layer of effectively partitioning cells called the cambium.

The Air Layering Cycle

During the time spent airlayering, the bark, the cambium, and the phloem layer are eliminated by removing around a 1 inch wide ring of these tissues from around the boundary of the shoot. The xylem anyway is left in one piece. This is known as supporting. By and large, manufactured auxins (in a vehicle of powder or by fluid) are applied to the site where the tissues have been eliminated. (In spite of the fact that applying auxin is the general practice today it isn't required for some trees). Wet sphagnum greenery (or one more dampness retentive soil) is then bundled around and over this supported site and covered with plastic and fixed.

What Occurs at the Air Layer Site

The evacuation of the bark, cambium, and phloem, however not the xylem, forestalls carbs and photosynthates from streaming down the storage compartment past the supporting site yet at the same time permits water and mineral supplements to stream up to the leaves. This holds the verdant bits of the shoot back from drying out and keeps up with them with a satisfactory inventory of supplements. The evacuation of the effectively developing cambium layer forestalls the recovery of phloem and mending over of the injury. On account of this the carbs and photosynthates streaming down the storage compartment gather at the supporting site. The presence of these abundances of carbs and photosynthates (esp. auxin) at the supporting site, in addition to the presence of the water in the sphagnum greenery, makes lethargic unusual buds in the space develop into roots. At the point when there are an adequate number of roots to support the shoot freely the shoot is cut off of the tree and afterward planted or pruned.

The Contrast Between Air Layers and Cuttings

The engendering of plants by cuttings happens by similar standards and has very much like conditions. The thing that matters is that the shoot is taken out from plant toward the beginning and water and supplements stream up the shoot from the cut site by slim activity all things considered. This sort of spread must be finished with little and slim shoots since the progression of water is deficient for bigger branches. Air layering takes care of this issue and permits the formation of new plants from extremely huge pieces of trees.

Thursday, November 25, 2021

ANYBODY NEED SAGE FOR THERE TURKEY DRESSING?


Hello to all and a very Happy Thanksgiving. Sage as a bonsai who would have ever thought? Oh excuse me I did.

Sage is a wonderful craggily looking material in the trunk and it is indigenous to most high and even some low Deseret areas of America and other areas of the world. I worked on a ranch in the state of Nevada years ago when I was young. The one small room little bunk house I lived in had an old pop belly stove and I would burn sage brush in it and believe me when I say sage makes for a quick and very easy hot fire.

The high desert of Nevada gets mighty cold at night and in real early morning time but that sage could warm up my entire little cabin in a heart beat and have my coffee brewing in a short time. Sage is very aromatic and the oils in the woody material will make it catch fire readily. The native tribes used sage for many different things and also for seasoning various foods. They made mats for there dwellings out of the sage wood as sage will strip fairly readily and can then be woven.

I did not know but the sage plant can actually talk to one another. No not really talk but they give off a sort of special chemical sent that can be recognized by other sage plants in times of stress or pest infestations and the like so if one is being attacked it can send out the sent and others are for warned and then can actually infect the invaders.

I was lucky to get this one and its been in my collection now for about ten years. I have no idea how old it is as it is a collected plant and only god knows its age. Sage leaves are pretty small and very pretty light muted blue gray looking. The sage plant can go a long time with out water as it is accustomed to that in the high deserts.

My sage tree is in a cascade style potting and in a nice dark blue pot and I have only transplanted it once since I have owned it.

The soil is my ready mix of pumice akadama, and lava rock. Almost all of my bonsai are planted in this same mixture only at different levels of akadama depending on the tree. Sage is truly edible and many animals and birds depend on it for extra food sources and nutrients, rabbits, mule deer, pronghorn and sage grouse. The sage grouse also use the brush for cover and shelter in times of need from other predator's. The young eat the seeds and the sage is a real true friend of the sage grouse.

Sage is in the family of Asteraceae and grows fairly prolific in the United states in many states and in many other countries.

This sage brush was collected in the high desert around Madras Oregon. The region is prolific with sage. It was collected on a fishing trip to the area. The sage can produce small yellow flowers in early spring and if you rub a sprig in your finger tips and smell it then your in for a real nice treat and or surprise.

 A lot of sage gets destroyed by wild fires every year and there have been ecology experts from the land management offices actually getting inmates in the Oregon Penial system to grow the plants to reforest a lot of the areas affected. It is said that they grew more 90 thousand plants alone in the year 2017 and are still making it happen to this day. The sage grouse is fast becoming close to being added to the endangered act and truly do depend on the sage for their survival.

If your out in any area where sage grows you may want to try and collect one. But always make sure you get permission first from a local forest service station area. Or try to get some seeds and plant them to grow one or many. If you do get permission to collect one then be especially careful to dig a wide area around the plant while trying to up root it and make sure you get as much of the root as possible.

Collect some of the actual soil where you dig the tree up and use that as its beginning substrate planting then later after your sure it is established good and not going to perish then move it on to the pumice, lave rock and akadama mixture.  Sage can live to over 100 years old if cared for properly.

 Good luck and I hope you have a wonderful Thanks Giving where ever you are in the world.


By: Harold Yearout ©Copyright 2021 Harold Yearout All Rights Reserved for more information feel free to contact me: h.yearout@gmail.com


Wednesday, November 24, 2021

Why do bonsai artists call multiple trees of the same kind a forest?

 Hi there and welcome to yet another of my many rants. The correct terminology would be to call it a grove of trees and not a forest. To further bolster my opinion then please if you will, can tell me the last time you were any where in the world in a forest and seen only one kind of a tree growing? 

No indeed in a forest of trees there are many varieties and types not to mention many other types of vegetation growing all over and around rocks, stumps, and ferns and all sorts of other things alive and or dead.

The Chinese are famous for plantings they call Penjing which often result in a very wonderful and beautiful looking bonsai display of many trees almost always of the same verity and kind of material.

Although this may not always be the case as in my personal Penjing for instance I have three different types of tropical trees and three ferns and a couple of Azaleas growing so it could sort of be a tropical forest I guess but I prefer to not call it that but a grove of trees and other materials.

 I personally only have one of such type plantings and it is a tropical indoor bonsai and consists of a Saikei Penjing planting of Ficus Benjamina, little gems as they are called, dwarf Hawallan Schefflers and small little Azaleas Kakuo some various small ferns and they were all taken as cuttings and grown on to be a nice grove of tropical trees in a lovely small shallow pot and all the material is growing on a hand made concrete slab and with various rocks and other items to represent some what of an island scene placed into a very shallow cheremic dish type bowl.  

Any way I guess the point of this rant is to indeed try to get other bonsai artists to call it what it is and not something else it is not. I will try to take a picture for you of the Saikei Penjing tomorrow and along with some other small bonsai I have planted.  I do know that when the Japanese plant these type of plantings they always use an odd number of tress for what ever reasons they believe that even numbers of trees in a planting is bad luck and so every one of there grove type plantings consist of odd numbers of tress and or other items rock ferns and such.

I also purchased a couple of small variegated ivy and one that was a little larger and had already been started as a bonsai. I do not know much about ivy but I will learn and start growing some varieties for my garden. I do know that we have an English verity here that is very strong growing and can be somewhat of a pest in the garden if not kept in check. I have some growing in my garden as ground cover and it does well as long as you do your diligence and keep cutting it back and keeping it under control.

I have a very nice Fukin Tea and it needs a hair cut very bad as it went nuts this summer and I did not trim on it and now it looks out of control but tomorrow I will prune it back and try to regain some control over the plant. I will try to root the cutting material off of it but do indeed not know if I will have any success in rooting any of it as it should be rooted from cuttings in the summer and or planted and grown from seeds. I have never done either so we will see what happens by just keeping the cut material in a jar of water and see if any of it forms roots.

No harm in trying as I hate to throw any material away that could possibly be grown on to make a nice little future tree. I got my hands on some very nice material this year and will be posting articles about the trees and pictures here in the next few weeks. So in closing for now until tomorrow when I attempt to get some pictures of the materials I purchased today I say good evening to you and have a good one.


As promised here are my pictures. Above is my Penjing planting I really enjoy this bonsai and it is of course tropical so needs to be indoors other than in the late spring or summer time. Can also be kept in a heated greenhouse in the winter.

This is my heart Ivy so named because the leaves are heart shaped.
As promised here are some pictures of my Ivy and my Penjing plantings one of the pictures of the heart ivy is to kind of show you the trunk girth. I will take a picture of my Fukin tea at another time because I will at that time write a post about that species of plant as a bonsai.

Here is a variegated ivy I planted from a cutting so far it's doing fine. It's just very small yet and will take at least three to five years to develop. I hope that I  have peaked your interest and maybe you will also try a Penjing planting as well as grow some ivy as a bonsai. Almost any material can be made into a bonsai and grown on for many years. It just takes time an patient's. Of course also knowing the material species helps so before jumping in do your home work..


By: Harold Yearout ©Copyright 2021 Harold Yearout All Rights Reserved for more information feel free to contact me: h.yearout@gmail.com


Tuesday, October 19, 2021

Getting close again to winterize.

 Hi there to everyone.

Don't let the snow balls hit you in the well now, you know where and start monitoring the weather in your area of the world.

So here we are in the month of October and it is getting close to getting into colder weather and so I personally have brought in all of my tropical bonsai and plants even last month in September. Although I wish I had a green house I do not, and it is not that I could not afford one. It is simply more of the plain fact I do not have the room where I live to set one into place and have it. 

So as a bonsai artist I have a very limited amount of topicals and I keep the collection small so that I can keep them in my home inside during the winter time. However all the rest of my trees stay in there original positions in the garden all winter. Now the only time that may differ is if I know in advance that we are in for some really severe and bad weather. Let's say for instance a really sudden cold snap or high winds and or ice sleet snow and the like then of course I do take the necessary precautions to protect my plants and trees. 

Let's first talk about locations and how you may display your trees. Everyone has a different kind of a garden and a different amount of room and such for display. So the type of precautions you may take are a matter of choice and what kind garden you have and of course the effort you wish to be involved in and the room you have to move plants and the time constraints and so on.

You may be in the position to put your plants in a protected are like a shed a garage or shop what ever and of course depending on how many you have and need to move to safety. Sadly to say I'm not blessed with that option so it is what it is and I make do with what I have.

I for one have never personally done or do what the norm suggests I use my own common sense and do what simply works for me. All right you say well what is that? Well so here goes my explanation of what I do to winterize or protect my trees if I know bad or harsh conditions are on the way. First of all I will move my tress down from any display stands to the ground and then if possible huddle them as close to together as possible and if at all possible up against a structure if possible. Also the location of your display garden matters. Is it east, or west, or north, or south, light and or winds and or other elements that might affect your trees.

My garden is rather large in respect to the lay out. I have one side that is east and west light so I get the morning light and sun on one side of my garden from about early sunrise till around 1:00 pm and then that side becomes full shade for the rest of the day and is a prefect place for a lot of my deciduous or more fragile trees. The other side is full sun from around 1:00 pm until sunset so it does get hot and needs to be monitored a little more often especially if it is a really hot summer like we had this year with temps rising into the triple digits and believe me it was hot.

On the other hand it is the perfect place for all of my confers, and I have a lot of them. As most of you should already know confers do like full sun and can tolerate it fairly well and still not harm the trees.

Now winter is a different ball game. Like I stated it depends on the conditions. Now let me back up for just a moment and explain bonsai display. For the most part everyone I know displays there tress on some kind of a wooden structure of sorts. Individual stands for instance or long displays where several trees are displayed on the bench and or structure. 

Well it may surprise you to know I do not display that way no indeed all of my trees are displayed on Cinderblock built up stands if you will. I try to keep most tress at different heights as to make the viewer not get totally bored while viewing and looking at my bonsai. Now for the reason I use cinder block for displays is that it is heavy and not going any place once set into position and the main reason is that wood rots, cinder block does not and I can tear down and move the display easily any time I so desire.

Here in the Northwest mother nature is the garden hose all winter and so I do not ever need to water any trees out side. Yes I know there are woods that are treated and so forth but trust me they still do rot and so I simply made the decision a long time ago not to ever build show stands or displays of wood. But that is your choice. 

Now if for any reason I do need to bring the plants to the ground for protection then the cinder block displays also provide a very nice wind break and I can simply move 90 percent of my tress to the ground in a couple of hours and then they are well protected from high winds and as for ice and snow well let it fall as it only acts as a insulator like I stated earlier. 

Now I now that a lot of books and articles state to use mulch and or hay and other various products to help protect and to also some what insulate the trees. I know a lady that uses old blankets I do not knock it if it works for her then it does and so be it I would not take a hammer and try to fix what is not broke. She swears by it.

I have never done that and never will unless were way below zero for many days and it simply so far in my life time in this area never got that cold the worst may have been 19 degrees and trust me confers can handle that kind of temps. One thing I will add here is that be prepared ahead of time do not wait till the last minute to make adjustments to your garden. I for one simply do not baby any of my bonsai they either make it or they don't. Simply put things do die and especially trees can go at any time no mater what you might do or think.

I will add that I personally have never lost a tree to cold weather but I did loose a couple this year do to the sever heat and it was my own fault for not moving the particular tree to a shady location in the garden. Being lazy and or not fully attentive cost me two trees that were very favorites of mine and not to mention they were very old and had been in training for many years. Oh and I lied I lost an azalea one year because it was in a cheap pot and that pot cracked and well you can guess the rest.

Also I might add it may continue with unpredictable weather conditions around the globe and I think we all know why. If you don't well then look up global warming.

Oh well you gain some and you loose some that is the nature of this hobby and anyone who tells you different is either a braggart or a liar. Trees do die and that is just the way of it. So if you can not handle that then do not create bonsai or buy them. I could rattle on and on for days about the various ways to protect plants and or bonsai in the winter time but I will leave you to do your very own assessment of how you wish to go about it in your particular garden and I will continue do mine as I always have simply because it works for me..

In closing I will state this fact to you. Be diligent and monitor the daily and nightly weather in your own area and be aware that topicals will not survive at temps below 42 degrees. So get them in a heated green house or bring them in doors to a well lighted area either with naturel light preferred or if not that for what ever reason then use plant grow lights.

If you have a cell phone or a tablet or a computer it is very easy to check in your area and know what the weather is going to be at any given time so no excuses if you do not check and loose plants. Also an important note here if the temp drops to the point that your trees are frozen solid in the pots then you can have a problem. Because you can not get water to the roots in that condition so the rule of thumb here is to have watered very good before the freeze. Need I say that once again water before the freeze a few hours in advance if at all possible.

The plants and or trees can then release moisture as they need it to the roots. Expect to loose your trees for sure if you did not carry out this task before a hard freeze. I have had winters here where the posts were frozen solid and like concrete for many days and still my trees and plants survived just fine when I watered before the freeze. Now I'm not talking just for say a one night freeze here I'm talking when it stays that way for many days.

By the way here is what it looked like in part of my garden the very first day an hour after it started snowing.


A few hours later I realized that it was not going to be a short duration and was only going to get worse so I moved all the trees to the ground in front of there stands.


Trust me this is only a few I have nearly three hundred eighteen bonsai so it took about three hours to move them all and I was needless to say a tired man when done but it was necessary. So good luck to you where ever in the world you are and have a happy holidays on the horizon. Be prepared is the word of the day.  Please if you have not read the article I wrote in 2019 about winterization it has suggestions that are not in this article so I suggest  you read it also.

By: Harold Yearout ©Copyright 2021 Harold Yearout All Rights Reserved for more information feel free to contact me: h.yearout@gmail.com


Friday, October 18, 2019

Time to winterize

Hi everybody,

Yes it is that time of the year once again, at least for my area and zone to start getting the plants ready for winter that is just around the corner. So you may ask well what do you do or what needs to be done to get the plants ready for the winter months.

The first thing I want to convey to you is that you should be very vigilante of the daily weather forecast for your area or zone and pay close attention to that to be truly safe. Storms we all no can happen in just a matter of hours and catch us sometimes off guard or not prepared. So above all for the health of our trees and plants be ready and prepared at a moments notice to move your plants into a safe area and out of the harsh winds and freezing temps if you have a space.

If no space is available then you must take other actions. For instance you may want to try and have a cold frame built and in the ground just slightly above ground so light can still filter down to the plants. Or may be even two or three cold frames or more depending on the size and amount of trees you may have in your collection.

If this is not an option and something you can not do then the next best thing is to move as many plants as you can safely to the ground and as close to some structure your home or complex for instance and then mulch over the tops of your pots up and too the first branch on your trees. Some people have been known to use even blankets or burlap sacks if available any thing that you could help to wrap around the pots and top layer of your plants to help protect them from the harsh elements.

If you live near or close to any kind of farming community or place where they sell farming supplies then I would be looking for some hay bales one or two depending on how many bonsai your trying to cover and protect for the winter months. Spread the hay about around all the tress and up to the tops of the pots and then I would place about half and inch of hay right on the top of the pot. Like I stated try to keep the potted plants at ground level and as close together as possible this will help prevent heat loss and also conserve space in the area used.

In my area I only use this method if it gets totally extreme cold or perhaps snows and the temperature lowers into the teens for several days. I live in Oregon in the Great Northwest and yes there have been times when it gets into the teens but seldom.

So in my area for the most part the plants are left in there original display areas and only moved to the ground in case of severe weather conditions or very high winds that could or might blow the potted tree from its existing platform.

As for my own personal trees I like to make sure that they are always in the best possible health and condition that I can provide before winter sets in. I also like to have my tress planted in the highest grade of bonsai pot as possible. Some people just never use good pots or in some cases even bother at all they simply leave the tree in the nursery potted plastic pot and do not bother with a high grade well fired pot at all. Well the difference is noticeable when spring arrives and your posts are either chipping off glaze or the pot is cracked.

It simply costs a little more to insure you have a well winterized pot for your plant. Winter month temperatures do and will fluctuate and things tend to move and contract at the temp affects it so if not a well fired pot to with stand this you will have many pots over the years that will crack chip or simply break all together.

I like to take my plants one at a time in the month of September and  begin preparation for winter.

The month of September is probably one of the most critical of all months for fertilization of your tress for the setup of nutrients for the following spring. The tree needs this fertilizer to make sugars and starches for the next springs explosion of growth.

I prepare my fertilizer in empty organic tea bags and use about two good teaspoons per bag and the amount of bags used depends on the size of the pot so for an example for a 12 inch sized pot I may use four bags and this is only my personal preparation some may use more or even less that is there choice.

I also like to clean off the top layer of bonsai soil being careful not to disturb the roots and add just a little bit of new materiel for added protection during the winter. Another thing to remember is most all tress roots settle in for the winter in most colder locations around the end of October and when at night the temperatures begin to drop below 42 degrees the roots tend to stop moving and then the tree begins to rest or is not nearly as active if at all.

At this time also I like to do any trimming of dead materiel away from the tree and in some cases I will even set some wire on certain tress as fall is the best time to see the limb structure at its best once all the leaves have fallen off and nothing is in the way of wiring.

But of course all of this can and will change depending on the one factor the weather in your given area and if your having a mild fall or a more sever one so again do your home work and watch the weather reports.

In closing always remember that the health of the tree is above all else paramount. So be vigilante and plan a little ahead and you will be glad you did.

By: Harold Yearout ©Copyright 2019 Harold Yearout All Rights Reserved for more information feel free to contact me: h.yearout@gmail.com


Monday, February 29, 2016

Why do we repot bonsai and is it important


 First of all let me explain that there are many answers and factors involved in this question . But first and for most in my opinion and very important it is for the health of the tree. Why do we re-pot and when is yet another question that often is ask of me and then again the answers are varied so let's get right into it and see if I can possibly answer some of your questions with the proper answers.


 It is of my opinion after creating and working with many types of bonsai trees over the years that one of the most critical things we as bonsai artists need to learn and do with our bonsai are first watering properly and second re-potting when needed for the health of the tree. Your main job as a bonsai artist is of course healthy tress and you can not attain that buy sitting on the side lines wondering what to do. So let's get on with it and see some of what is involved.


 First of all we may be re-potting because we only wish to change the values of the tree by that I mean perhaps we want a different pot for a different overall look and or feel or perhaps we want a different color of pot or we wish to re-position the way the tree sit's in the pot and we may want to change some of the styling which in turn often affects the pot chosen for the tree. Or as stated above perhaps we are re-potting because the tree needs it for the total health of that tree. Which I might add is most often the reason we do re-pot our trees and that is to keep them healthy and thriving for many years in pots.


 So when and how often do you re-pot you may ask and again I would answer there are many factors that we would take into the scope of it all. The type of tree or shrub and the health of that tree or shrub and other reasons are many but is your tree healthy and growing vigorous and strong? If so then why re-pot I ask?

 But on the other hand is it in need of re-potting because it is root bound or not growing any more and just kind of sitting around on the bench not doing much, do you wish possibly to re-pot it because you want or need a different pot and or shape style and or color. Is it the proper time of the year to re-pot the tree and is it healthy enough to re-pot.

 Once you are more experienced then you will learn when and how, and it will be a task nearly every year for your deciduous and of course longer for conifers simply because conifers grow at a much slower pace than do deciduous trees.

 Although at this point in this article I will endeavor to give you my own personal insight here. The teachings in many of the better quality bonsai books on the subject will try to tell you or point out to you the age old wisdom taught by the Chinese and or Japanese that the rule of thumb pardon that pun that for conifer it should be every three to five years and for deciduous every other year. I personally find this to be rubbish.

 I have been raising and growing bonsai trees and shrubs since the young age of 9 and I'm not nearly 80 and I have trees in my collection that are truly as healthy as can be for any bonsai and some have not been re-potted on that time line or any other time scale.

 I pot or re-pot when it is as explained above for most for the health of the tree but why as the old saying goes take a hammer and fix what is not broken.  Simply put as I can it is a matter of your choice and the way you may or may not have been taught.

You as a bonsai grower or caretaker must learn about your trees and there needs and if I might say the wants of every tree as they by species are all different other than a huge class they might belong too.

 Some need little attention and can grow on healthy and fine for many years with out being totally fussed over or touched at all other than to water and fertilize. While yet others will need that so called time table and need attended to year after year by re-potting and root pruning and so forth. So I would tell you if your going to grow bonsai for your own personal enjoyment or for resale learn the needs of each species of tree and or shrub and the class it resides in and what it requires to grow vigorous and healthy.
To put  it as simply as I can do your home work. The internet is full of information on nearly any species of plant and shrubs. So if you do not do your due diligence you've no one to blame but your self if your tree parishes. Study its needs like a drill instructor in the service. No all there is to know about any given species, and you will be off to a very good running start.


 There are so many yet other total factors that I could touch on here in this article but I fear for the sake of bonsai in general you would after all become totally bored so I'm trying only to hit on the real reasons.

 It would be fair to say here that most all deciduous trees should be re-potted in the very early spring or when you as the owner can first see signs of buds begging to swell and close to opening on into leaves.

So when we see that swelling of the buds it is a good time to re-pot if the tree needs it and is healthy enough to with stand the shock of re-potting and it most defiantly is a shock.

 In point of fact please kind of consider re-potting to that of major surgery on your self it is a critical thing and must be carried out in a good clean manor and in satisfactory time, and by that I mean you should be prepared and have at least some knowledge of what to do, you should not be fumbling around looking for a tool that you should have had at hands reach right from the start or you should not be letting the exposed roots dry out because you do not have a spray bottle with water at hand to keep them misted and wet while working.

 Of course there are many other things that are involved and I will try to explain them as best as I can but if your indeed a beginner or in question of what to do it is always best to attain as much information to prepare yourself in advance or simply take a class from someone that is accomplished and can instruct you how to do it, there is truly no substitute for hands on information.

 Now Conifers can and will wait until further into the spring to re-pot. So my rule is to re-pot my deciduous first and conifers second unless totally needed sooner for the health of the tree.

 We as the surgeons must be prepared and ready in advance, we need to have all necessary tools ready cleaned and a new pot selected and prepared if your indeed going to use a different pot. If  your going to use the same pot the tree was already in then it is slightly done a little different but still all tools and materials should be prepared in advance. You would not take a patient into the operating room and not be prepared.

 What are the tools needed for the task at hand?


 Now at this point bear in mind that this is my way of doing it  and could be done different by others and I would be the first to tell you that this is only my method and not always excepted by others and that opinions are like clothes most everyone has some and or wears them but opinions of how they dress in them can truly differ. So it is up to you to decide. If you like my method use it if not find another's way of showing you or doing it.

 First off let me explain my method when using a new pot. I will always have my pot prepared in advance and ready to accept the tree. The pot could be of any of many different styles and shapes but it should always have at least one main drain hole and possibly more and some smaller and other tiny holes for inserting wire tie downs. I would interject here that the hardest pots to use are ones with only one main drain hole and they are very plentiful so you will always see a lot of them around in Nursery's I personally try to avoid them if there are other choices as the process for making and tying in screening and tie down wires is somewhat different for this type of pot.

 But if your out and about pot shopping then try to attain a pot with more than one drain hole and at least two if not more smaller holes to insert wire tie downs into the pot. Now let us assume that you have selected a new pot with these characteristics and are ready to prepare that pot.

 First step is to cover the drain hole from the inside of the pot with some drain screening so that bugs and other incest's most often can not attain entrance into your pot from the underside. Turn your pot upside down on your working surface and measure across the drain hole from left to right or right to left does not matter the width of the drain screen your going to use and it should by pass on either side of the drain hole at least ample enough to completely cover the hole and have some material left over all the way around that area.

 Then cut a piece of wire from at least a size 1 or 1.5 or possibly 2 or 2.5 of at least three times the length of the size of your drain hole. Now it is of note to make here that there are many different types of ties for the drain screen but in this lesson I only use one and that is of the U shape simply attained buy bending and shaping the cut piece of wire in the shape of a U equal lengths on either side. So if  you were for instance to hold up your thumb and little finger straight up and tuck the rest of your fingers into your palm you would form like a U looking shape and that is what you want with the wire tie for the main drain screen in your pot. I guess here it could be easiest explained that the shape would indeed look like a staple.

 Also for the purpose of this demonstration I'm going to use a pot that does indeed have only one main drain  hole and some other holes for tie down wires. Now in the picture below you see the bottom of the pot and it could be any style of pot as long as it complements the tree and of course that is a different lesson and time.

 So then indeed below you can view a picture of the pot I selected and the tools I use to re-pot with but remember like I said this is  only my selection and may vary from person to person.


 So then here are my choices from left to right first the pot with one main large drain hole and five much smaller holes that are used for wire tie downs and that I will discuss in a moment but first the rest of the tools in the picture, next is my curved blade used to help loosen the soil around the edges of the pot if you are indeed re-potting a plant that is already in a pot. This will be yet another lesson in part two of this series of re-potting in the next session I will go into more detail of the actual re-potting of a tree that indeed is going to go right back into the same pot and more showing you how to trim the roots and make it ready to go back into the existing pot. But in this lesson I'm not showing the trimming of roots and all the other factors only the way I prepare a pot and make it ready to plant a tree assuming of course that the tree  has all ready been prepared for the pot and ready to plant.

 Next you will see my wire cutters, then there are my are my pliers, next are my chop sticks, and finally my Scissors. Then you will see one piece of screen that I have already cut for my drain hole.

 All the above are what I use to re-pot and to make ready my pot. Wire is the only thing not shown in this first example and a spray bottle for keeping roots wet wile the process is taking place. Wire of course depends on the tree its self and the size and how large or small the tree may be. For obvious reasons a little bigger wire for tie downs if the tress is indeed larger and needs it and smaller of course for smaller trees that is your choice as to what size you use and if it be copper or aluminum and again this is a matter of preference.

 Next then I would take the piece of screen that I cut to size and turn my pot over and position the screen in the pot as close to center of the main drain hole as possible then I would take my precut U shaped wire and run the wire through the precut screening just at the very edges of the main drain hole on either side as to make a rather good snug fit then hold in place with your thumb or other fingers while you turn the pot back over and then press the wire emerging out of the bottom drain hole into place on the bottom of the pot firmly with your other thumb to hold the drain screen snugly in the pot.


You will then most likely have a little extra wire and it can be cut so that it is not overly in the way at the bottom on your pot that is to say just snip it to say around less than a quarter inch or less on either side. It should still be snug and not move around at all. If in doubt then test to ensure you did it right.

 All right then now we come to the tie down wires they are to of course added into the pot from the bottom and then brought to the top and also in the shape of the former U. They are used to tie the tree into the pot anchoring it in place. There are couple of main reasons, one so that the tree is sung and stable in the pot and the roots are not moving all around in the pot every time the wind wiggles the tree and to insure that it is not blown out of the pot in foul weather and of course to prevent your not so bonsai friendly friends from picking up your tree by the trunk and in so doing actually yanked it free removing it from the pot because it was not wired into the container. On my gosh did I really say that... Yes in my early years before I learned to wire them it actually happened just that way.

 All right then let's make ready our tie down wires and insert them into the pot. I take enough wire to measure at least three quarters around the pots circumference and one slightly smaller buy perhaps and inch or so at best then I bend these wires also into a u shape and then insert them into the smaller tie down holes most often at the outer edges of the better well made pots and you will indeed learn what are good pots as you progress and what are bad ones for sure. Now pull these wires on through and place them as close to the edges of the pot as you can and actually place them over the rim or edge of the pot out of your way.

 Now your ready to plant and make ready your chosen tree. Next I would place a layer of medium to large pumice into the bottom of the pot for drainage. Then I would place at least one scoop of my favorite potting soil into the pot in the position I want the tree to sit. I will work the scoop of soil into a upwards mound and then carefully position the tree over that mound and gently push down on the mound while twisting the tree from side to side slightly to insure some of that soil works its way into the center mass of the root ball on the tree.

 Now then I'm ready to tie my tree into the pot into the desired position. I will bring the wires together over the mass of root ball as gently as possible and then twist them together a few times to ensure they have made a grip and then I will take my pliers and gently pull upwards taking out some of the slack in the wire and then with the pliers make a couple of twists too the wire and release then repeat till you feel that you have indeed secured the plant into the pot. Now your ready to begin adding more soil and working the plant into its desired container.

 Once again here I will add that you should use if possible two sets of tie down wire and if not one will often suffice. But again more is better and once again a matter of choice and preferences. This way with more tie downs you can work from one side or the pot to the other and make even a more secure tie down overall. As most people that have been doing bonsai for any time will tell you the wire ties are also now acting as the anchor for the tree because in a lot of cases you have removed larger roost and even the main tap root of the given tree to insure that it fit in the pop you selected in the first place.

 Now here below you can see a proper prepared pot with drain hole screen in place and cut to proper size at edges so not to have excess wire on the bottom of the pot which could make the pot shaky or wobble around on it sitting surface. Some do have legs while yet others do not so they are not raised up so that the wire does not interfere with the pot wobbling around. Of course it is best to find a pot slightly raised above its intended surface some what either with legs or some other way slightly above the surface or you might need to raise your pot up by placing something under it.


 Now I'm ready to add more working soil to my pot and begin the process of working it into the pot. This is where my chop stick comes into play and you can get them made out of plastic or real wood at nearly any Chinese restaurant when you eat a meal there the chop sticks will be free for you to take with you when you leave. Or of course simply go to a source and buy your self some. It would be better if they are made from real bamboo but not absolutely necessary.

 Also another good use for chop sticks if your just starting out with bonsai and want to really learn when your plant needs to be watered then take a pair and break them in half making now four pieces and place one of them into your potted tree all the way to the bottom and then every day pull it up and take a look at it and you will be able to see the water line on almost all wooden chops sticks as they will absorb water and then when drying out the water line will continue to works it way up the chops stick. the closer to the top the dampness is the sooner you should water again. Simple enough right.

 Anyway off the beaten path here so back to it, now I will take my scoop and add more soil all around the pot and gently tap the sides of the pot to settle as much of the new soil as I can then starting at the edge of the pot I will work the chop stick all the way to the bottom and gently wiggle back and forth and with my for finger pushing soil on down into the hole the wiggling has made and then repeat all the way around the pot at the edges until it is firm and once in a while I will tap the  sides of the pot yet again to see if more soil will indeed settle if not then I will insert the chop stick at about a 45 degree angle pushing towards the center of the pot and work the same way causing new soils to settle in the center root mass closer to the center of the potted tree. Work the soil until you feel that no more will fall into the small holes you have made by the wiggling of the chop sticks back and forth.

 Now like I stated and will once more this is my method but you must learn what truly works best for you and if you take lessons from some one and they clearly have been doing this for a few years and have proof to show you then you should by all means do what they tell you or show you because it should be clear to anyone that if they have planted trees in bonsai pots in there garden and they are healthy then they must know and have some knowledge of what they are doing.

 Bare in mind this is part one of re-potting and I will show you the other parts of my ways to re-pot in yet another installment in part two so be looking for that and as always happy bonsai to you and hope you return for more of my ramblings..


By: Harold Yearout ©Copyright 2016 Harold Yearout All Rights Reserved for more information feel free to contact me: h.yearout@gmail.com


Sunday, October 19, 2014

A most majestic pine the Ponderosa

 Hi and welcome once again to my bonsai channel, today I'm going to tell you a little bit about one of the most majestic of all pines, the Ponderosa and we do not need little Joe or Hoss from Bonanza to help us.

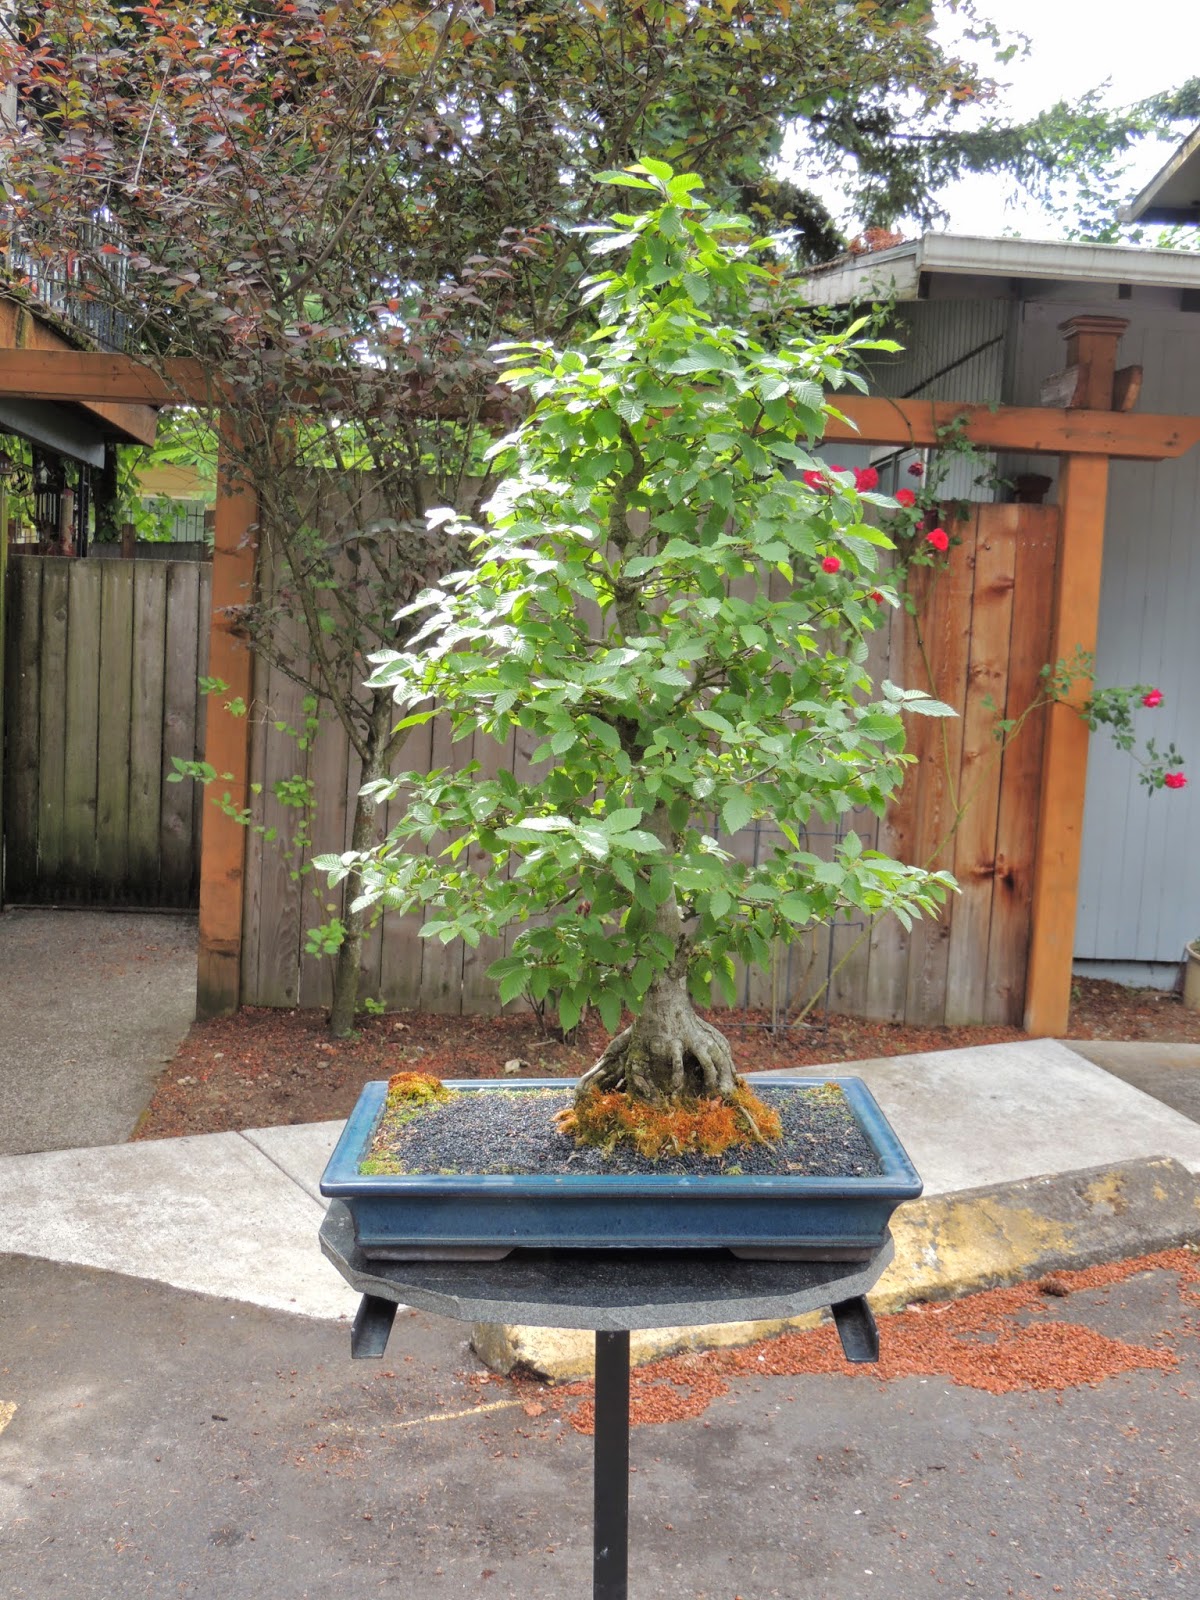
 The tree you see here in this picture is roughly 150 years old and by that I mean I have no real way to totally determine the actual age of this tree but however by using an age old theory of age dating trees by counting growth rings from a core sample taken at the base of the trunk one can then count the rings that form around the trunk through out each season and then pretty closely to some degree determine the age of a tree.

 So that is what has been done with this tree. One core sample was taken at the lowest part of the trunk where it was at its widest and most thickest around then the core sample was examined and the growth rings counted to determine a fairly close age for this tree.

  However let me just state for the record here so as to way off any confusion there is truly no way to totally at best determine the real age of most tress, at least not ones growing in the wild. But lets assume that you yourself planted a tree from seed and you yourself grew that tree all your natural life and then it was passed on down to the next generation person say for instance in your own family like many Japanese families have done over the ages, and then yet even once again the same tree is handed down again to the next documented person and they in turn grew the same tree for there natural life time and so on and so on of course all the time keeping accurate records in printed form and most assuredly keeping photo records when and where at all possible then indeed we, or he, she or they could indeed have a pretty accurate recorded of that given tree.

  Then of course there should be no questions in anyone's mind as to the true said age of such a tree.

 This I might add is and was a real practice with the Japanese culture and so most all of there tress are documented as to age. However not so here in the western civilization simply because no one seems to care, I might add of course other than the true collector. However the  average joe or person who buys from there local nursery will almost always not get any real documentation or true age of said purchased trees.

 Also if they were lucky enough or even far enough advanced in the art of bonsai to go out into the forest wilds and collect a Yamadori meaning collected in Japanese they still would not truly know the age of said collected tree, because age at best is something we all can only estimate.

 However let's just try to be as practical as we could be and say let us assume that we are out looking for a tree to collect and we find an area in the forest that looks promising and we spot a small tree and by small I mean a tree say possibly fist sized around or maybe even two fists sizes around you would get pretty excited at least I know I would . So then my next thought is gee I wonder how old it is?

Well like I said there is no real way of knowing with out having a somewhat accurate core sample taken and that is not as easy as it sounds.

 But what to me really remains as the kicker is how did that tree get in its resting place in the first place. Did a seed fall from a mother tree close by or did a bird drop a seed or perhaps some other critter, because lots of forest animals bury seeds only to forget where they hid it and then the seed germinates and pops up and starts growing. So then how long did it grow there in that place you found it. Has it been there a hundred years perhaps two hundred years maybe even more and no one knows for sure.

 Any way the whole idea is astounding at best and truly should be taken into account and well thought out with how ever the tree was age dated estimated or other wise. So I guess what I'm trying to truly say is don't boast or brag or what ever unless you can prove it or have accurate records it will only serve to make you look foolish and not only does it make you sound and look foolish it is very misleading to the viewer and to the public in general.

 I for one being a true avid collector and caretaker myself of bonsai do care and have trees that are as young as only a year or two and some that are upwards of two too three hundred years of age documented of course, simply because a lot of my trees have been handed down in my family for four generations and a lot of the tress I now own were purchased by my family from various parts of the world and some of the older specimen tress were purchased in Japan in the 50s and these tress were already well established and old when they were acquired and bought then now add my young age of only 80 years to the mix and you do the math and then decide.

 One of the other nagging factors with age of tress of course is that of constant climate changes and conditions and these all affect the ring count on trees of course so you only can estimate at best and or guess if you do not have paper work and you might say what is all the fuss about age anyway well its a matter of bragging rights for one thing with some bonsai people I guess and or what ever, but for me it just makes sense to no and of course if you ever plan to sell any or all of your collection it is going to be a really big factor in determining what you get in the way of money out of your collection.

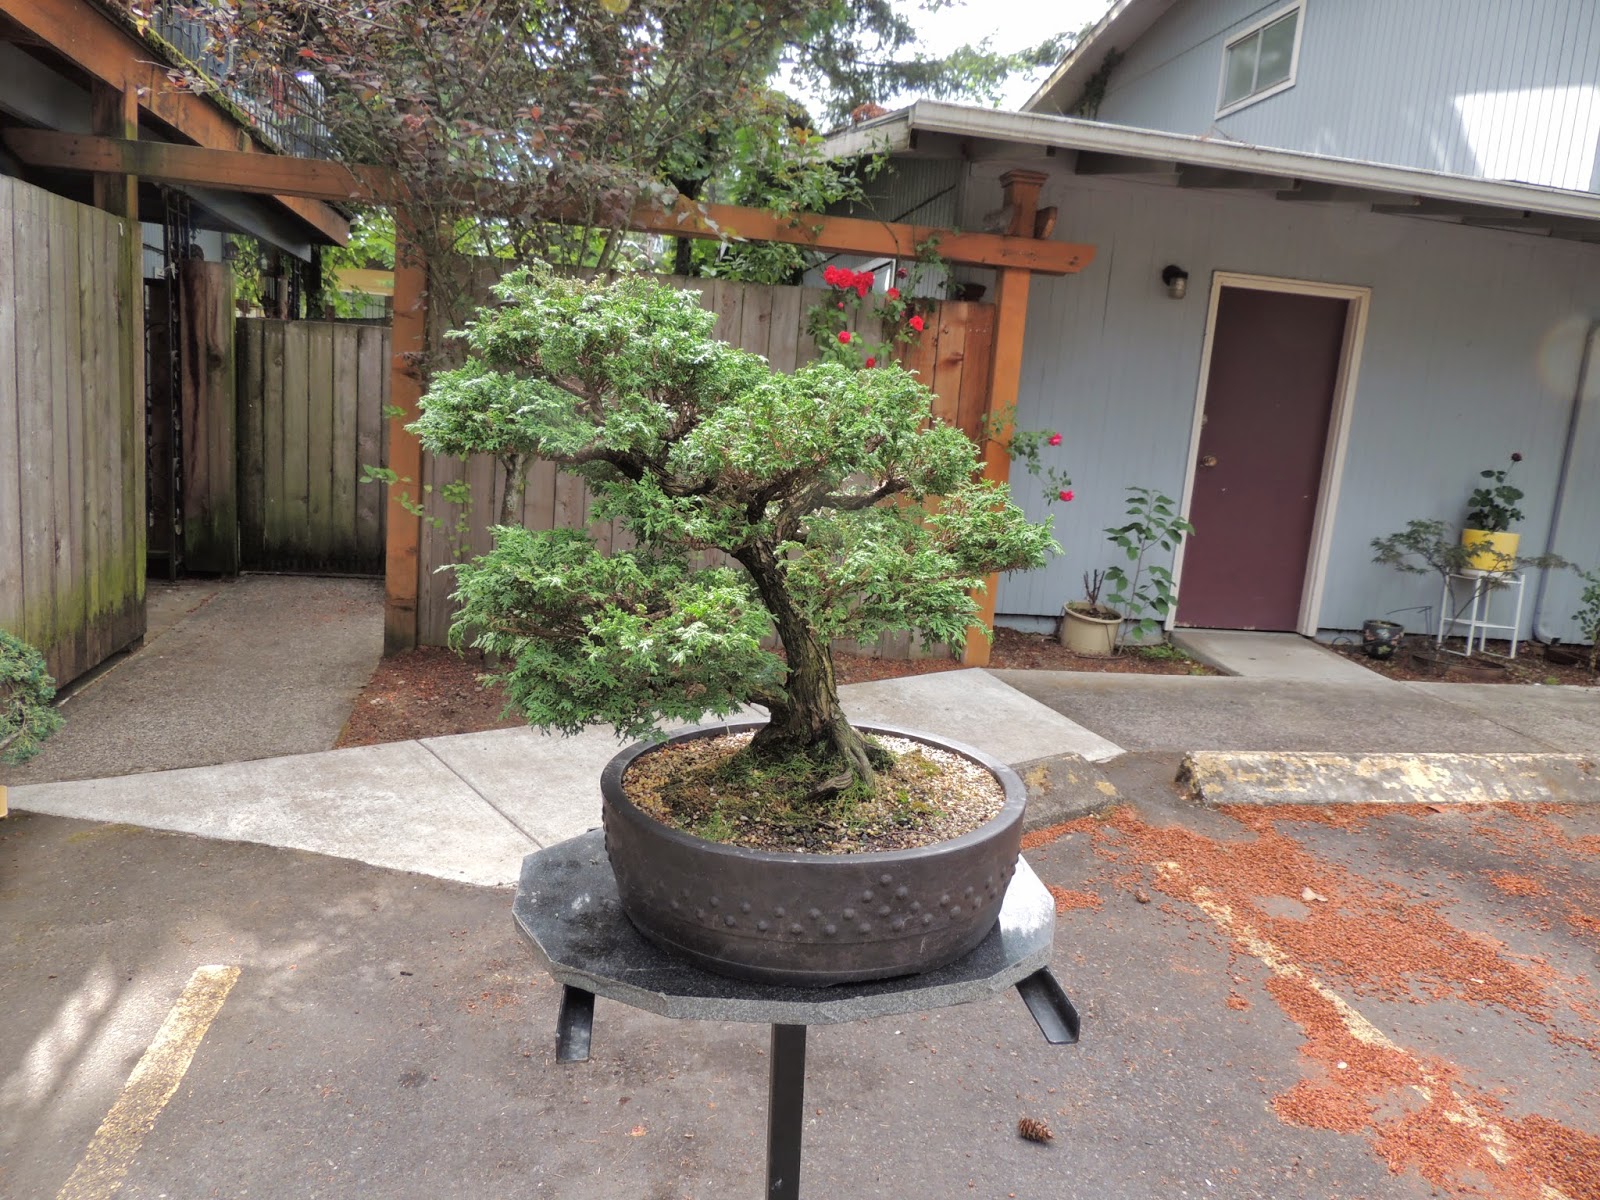
 This tree was an acquired tree from a local Nursery and they had no real information either about the tree. For instance it would have been nice to know where the tree originally came from or even from whom, and that is sad that no one even seems to care to ask or do any kind or research to find out where the original tree came from in the first place and that includes many nursery's at large so buyer beware it is always a good thing to practice in buying bonsai trees ask for as much information as they have.

 Was this tree say collected or was it perhaps started from a seed or even from smaller nursery stock purchased and then grown on to what it is now. The real way that this tree came to be what it is today seems totally amazing to me at best considering its size and stature, but when I first saw it I could not resist having it so I saved and bought it. Now normally I would never undertake purchasing a tree with no history but this tree to me was just to awesome to resist no matter the outcome.

  Of course the ways that it came to be could be many but indeed with a tree of this size and stature you would have thought that someone selling it would have cared enough to ask the person they purchased it from. The tree has been in my collection now for a couple of years and I have been working and continuing to further style and train it since. These pines live to be hundreds of years old even in pots if cared for properly and I for one truly do take care of my plants as bonsai and have for many years.

 The Ponderosa was first collected way back in 1826 in Eastern Washington near what we now no as Spokane, and it is also the state of Montana's state tree and grows predominantly in the western range of the United States and Canada, although it can be seen as far as the plains of Nebraska and of course Nevada where a Television series was created called Bonanza and the ranch they used in the series was called the Ponderosa more than likely because that area of filming had an abundance of these trees.

 These pines can also be found as far south as Texas and on in too Mexico so yes the Ponderosa has been seen growing in a lot of different places and climates but still out side of being a bonsai it does grow predominantly in the Great Northwest.

 These pines have a real tolerance for many conditions to include harsh rains wind and also dry climates where the trees would even say struggle to live and still they survive. I for one do nothing special with any of my trees other than to water as needed and feed throughout the growing season  and then let nature take its course. I do not baby any of them or take any special precautions like some bonsai people do.

 I truly have always believed that if you just let the trees grow on there own and only do your job of watering and feeding and repotting when called for you will have a good healthy tree for many years to come, I know I do.

 When I do loose a tree it is because of my own neglect 90 percent of the time and not the fault of the tree or any other conditions other than me forgetting to water enough or over watering and or not enough sun or too much sun the list of conditions goes on and on but the bottom line here is do your research for each tree you plan to grow and you should be good to go.

 Say for instance one of the deciding factors for Ponderosa is that they need totally full sun or as much as you can provide to really do well in your garden and they can go on the dry side for a bit without harming the tree so like I said again simply do your own home work before deciding.

 The Ponderosa is no different and it is a very good looking pine to add to anyone's collection. These trees have a real stout needle and depending on where the tree is growing in the vast scheme of things it can have any where from two needles too three but the most common are three and that is what I have a three needle Ponderosa.

 The size of these trees if left to grow in the ground can indeed reach some pretty majestic heights one was located in the state of Oregon and was measured out by a top horticulturist to be 268.29 feet tall and close to eight feet in girth and is on record now as the tallest pine known taking over the former record held by a sugar pine.

 The Ponderosa Pine has also been called the bull pine and the western yellow pine and sometimes even the blackjack pine. Although most of these tress do grow in the state of Washington and Oregon they can be seen in many other areas as well and could be collected by an avid bonsai person and then kept in bonsai art form for many years assuming you know what your doing to start with.

 If you do not have the knowledge to collect trees then by all means do not try, as in most cases you will only kill the tress and do no one including yourself any good. So if you want a collected one then by all means either purchase it or take someone along that has knowledge in the field of collected trees to help you.

 Ponderosa Pine makes a very nice tree indeed for bonsai and any younger tree can be wired easily and trained into a very nice desirable shape with a little practice and time and they will survive in a fairly wide rage of climates and tolerate many growing conditions. Younger tress are known for there more blackish bark and are often times called blackjack pine because of this. Often times the older tress will eventually be noted by there orange colored bark and look a whole lot more majestic.

 If wounded by nature the tree will emit a sap like resin we often times call pitch to help in covering over the scar and helping the tree to heal over and bounce back where it was wounded. If a limb or branch is removed in the art of bonsai then it is important to help seal over that area with cut paste used by many bonsai people to cover over areas cut on a tree.

 Well at least I hope that I have sparked your interest in getting your self a Ponderosa for your tree collection if you have not already procured one. In closing happy tree hunting and please have a very nice summer.
 
Thanks, for reading,


Update for this tree it is going to be reworked this spring or possibly fall I'm not sure just yet weather and all permitting. But if you look at the tree closely you will see that it now has three places on the tree that could be considered a top or apex and that is truly not expectable in the world of bonsai so by reworking I mean to correct this and try to restyle the entire tree and this will be a major undertaking for me but it will happen.


By: Harold Yearout ©Copyright 2014 Harold Yearout All Rights Reserved for more information feel free to contact me: h.yearout@gmail.com


Monday, August 11, 2014

THE CYPRESS AS BONSAI


 The cypress is a very nice choice for anyone creating a bonsai even if your a seasoned gardener or a beginner. It can be trained into a very wide variety of styles and this makes your choices fun and easy with a little work on your part.

 First you always want a good nebari for your Cypress or really for any bonsai for that matter. You will want to look for good placement of the branches and limbs for your tree.

 I tend to usually start with a good one gallon size nursery stock plant and then work from there to begin a style and I tend to leave it in the one gallon pot for a year or two to just get some growth and then I will take it out in early spring and plant it up into a desired bonsai pot.

 Or if you have plenty of time and are not in a rush you could plant your tree in the ground in your garden and let it grow on for six or eight years and obtain a really nice caliper for your trunk and then did it up and start the process of shaping and creating into a desired bonsai.

 I have started many cypress just from cuttings as they do seem to root well for me easy. I can not say that they would for everyone. I discovered actually by accident one year that the Squirrels around my place like to bury there winter forage into some of my bonsai pots and along with that for some reason they always seemed to deposit a piece cypress leaf or branch  and that begin to grow in my pots along with the other bonsai.

 In fact this happened on several occasions so the next time I trimmed some of the longer branches off my cypress I scraped the ends of the stem to scar it some and then just dipped the ends in some root tone and stuck them down into the bonsai bowl and they actually rooted and begin to grow. 

 So then I deduced that it must be fairly easy to start from just a leaf or branch.. So now every year I stick a few and let them grow on to a size that I can work with. Sometimes this takes an entire season to happen but it does never the less at least for me anyway.

 One thing I have learned about cypress as well as junipers do not trim your plant with scissors as this will turn the ends brown and unsightly. Instead pinch them out with your fingers and its actually easy to do.

 This cypress pictured above is very old around sixty years or more and well developed and the shape and style is very close to a informal upright. I have worked on this tree for many years to obtain what I now have and it won two show awards this year. One for the customers choice and one at yet another show for best in the show.

 I'm very happy with this Cypress. I did screw up a bit on it later this year as I had it sitting near my air conditioner exhaust to the outside of the house and it burnt the top of one of my branches and turned it ugly brown and so now I have to wait till next season for this to grow out and put on some new growth to hopefully fix and cover over the ugly brown ends.

 I use a very granular soil mix for all of my conifers and this Cypress is no exception as with most all conifers they do not like wet feet and so you should always strive to have a good granular mix for these types of plants to increase the flow of water out of the pot. The type of soils I make will actually draw up some of the water and disperse it later out into the pot as the tree begins to dry out and need it.

 I pinch my plant out in the early spring after it has established a considerable amount of new growth.

 Then sometimes I will pinch it out yet again later in the season if it seems to have any branches that are in the way of the viewers eye from front to back. I like my tree to be well podded up and the branches well rounded and this makes for a nice looking bonsai to view.

 Pests are none that I have dealt with and if any at all sometimes some small spiders may try to build there egg laying nests in the tree and I keep a keen eyes out for that and spray right away if I see any.

 Watering is pretty much every day in the hot season and misting a couple times a day if its really hot out. Other than that I water normal every day and I do not do anything special for this tree in the winter I just leave it out where it gets the winter rain and as long as it does not get way down in temperatures below freezing for any long periods then I just leave it out in the garden and it does just fine form season to season.

 As with any plant if the temperature does drop below freezing for any long periods then I will take the plants into a sheltered area of my back store room shed. Over the years my bonsai have withstood the test of the times for sure with rain sleet hail snow and freezing rain and temps well below zero and they still survive simply because I do not baby them. My rule of thumb has always been to let a plant get well acclimated to the out doors and then it seems to do just fine.

If indeed the tree is for your climate region to begin with and I always try to get material that is at least if at all possible two to three climate regions below mine that way I know for sure it can with stand the harsh climate if it gets real bad out. Say for instance your in a climate region of say eight then I would try to get a plant that will survive in region say five or even three..

 The key here is time watching as I like to call it. If the weather changes real rapid to real severe and  bad then I will act but other wise I just let nature take its course of action and only in the spring will you tell if they truly survived or not. Lots of your bonsai as well as mine will go to sleep so to speak in the winter months and not grow at all and in this state of sleep they will use water as they need it and very little nutrients and only begin to bud up again in the spring as the weather becomes gradually warmer.

 Deciduous trees will loose all there leaves in the winter months and be bare and so this is a good time to get rid of some of the unsightly and unwanted branches and kind of restructure your tree if it needs it. I do not get too carried away clipping out limbs just the dead ones or ones that I no for sure need to go to get my desired look and shape.

 Cypress are wonderful trees and make lovely bonsai as they are pretty easy to train and shape and style and I love all of mine and I have several in my garden.

 Feeding should be every other month through out the growing season and then slack off till spring again. Make sure you try to re-pot your Cypress every three to five years depending on your pot size and overall size of the tree of course.. Some will need to be sooner and some of course can wait for another year of later.

 So grab up some cypress of your choice and begin and you will soon have your self a nice looking tree to add to your collection.

Thanks, for reading,
By: Harold Yearout ©Copyright 2014 Harold Yearout All Rights Reserved for more information feel free to contact me: h.yearout@gmail.com


Friday, July 25, 2014

Wiltonii Juniper

 Here you will see one of my favorites bonsai in the garden. This Juniper is very old and the trunk on this shrub is the center of attraction for most visitors too my garden. This tree took two awards this year at a recent show.

 This particular type of Juniper makes a very good ground cover in almost any garden and also can very well be trained with time and patients into a stunning bonsai as you can see from the picture here.


 The juniper here is over thirty five years old and is named after a nursery that founded the variety back in the year 1914 in Ct. It is often times more commonly called Blue Rug and will take full sun in most types of soils in your garden if planted as ground cover. But of course if your going to train one into bonsai like the shrub here has been trained then you will want fast draining soil and keep it well watered but not totally wet either.

Typically in very hot weather I will water my bonsai twice a day and mist in between. This means on days above 80 degrees for my garden and yes it does take some time but anything worth doing is worth doing right or just do not bother at all if you do not wish to spend the time to take care of your plants.

 Like most Junipers it will do its best in full sun, however it will also tolerate shaded areas with part sun in the garden.

 Pests are possibly scale and other than that pretty much none known and if any at all then I personally would use my favorite bug spray to get rid of them. Not much pruning on this particular plant once it was well established. I do thin it out a little latter in the year around June in my area.

  As with most all junipers they tend to be slow growers anyway so not really a whole lot of pruning at least as a bonsai that is, but left in the garden as a shrub then you will need to contain it or it will over run an area quick.

 I use my own personal soil mix and you can read about my recommend mix in yet another article on this blog.

 This tree will be worked down into a much smaller pot this next season but for now it is what it is and will remain in this pot. It was too late this season too work into a smaller pot so I left it alone for this year. I simply had other tress in my collection that needed my attention and there were just to many that I had to work on and so this one got skipped this year.

 It does happen sometimes not deliberate of course but sometimes it just can not be worked like you would want because with a large collection like I have you simply run out of time. Any tree like this should never be majorly worked past spring as it just gets too hot for any repotting to take place.

 These junipers are crawlers and creepers if left unattended for any long periods and are truly used in most gardens as ground cover and they have a kind of blue cast in the winter months and they also grow berries and this can add to the interest of the plant.

 You would spend many years getting a trunk like the one here, which by the way has been lime sulfured to create the Shari look and in point of fact even perceives more age than the tree truly is.

 So if you plan to bonsai one then just be patient and take your time to achieve the look you want and not necessarily what you see here either, it can be what ever you like.. It could very well be full cascade or even a half cascade or wind swept or many other styles, maybe even upright just decide on a style and then go for it. 

 This particular shrub now trained to look like a tree was originally growing straight up and then we had a very large amount of snow one year and it bent the main branch back down and in almost a reverse position making the main branch twist backwards back and up over the plant giving the trunk an even more interesting look and style.

  So it was then decided to leave it in that position rather than trying too bring it back straight. So mother nature decided the style of this tree and she did a pretty good job if you ask me.

 You can find this juniper in most nurseries and I hope you find one and start your own as bonsai as they do make a special one for sure. Try too start with at least a one gallon size and work it from there.

Thanks, for reading,
By: Harold Yearout ©Copyright 2014 Harold Yearout All Rights Reserved for more information feel free to contact me: h.yearout@gmail.com


Tuesday, July 08, 2014

The great Hornbeam as bonsai.

 Hi everybody sorry there have been no posts but its really been hard for me this spring.  I have been so busy in the garden tending the bonsai and repotting  and trimming and wiring, and then being  out and about to some nurseries and all that I simply have not done my job and posted any new content.

 However I have lots of new stuff coming into its own this year and yet more to come so there will of course be many more articles, pictures and new content and things to look at and ponder.

 One new addition to my garden this year was this  Hornbeam. A simply awesome bonsai really well trained.

 I purchased this bonsai early on in the spring from another persons collection even before it had begun to bud up and so all I could see was the limb structure but that was enough for me to no that I truly wanted this tree for my collection. Normally I do not purchase bonsai I create and grown them my own that is that idea of the hobby in the first place but I simply could not resist this tree.


 Well now it has come into its full leaf and it is absolutely awesome at least to me any way.. This tree is about 35 years old and is doing fine and of course I will need to repot it next year as I did not do any thing with it this year but bring it home and watch it leaf out. As you can see I hope at least from the picture it is a nice sized tree with a really wonderful full nice limb structure also a awesome root system and its rooted in a very shallow pot less than one inch in depth. This tree would also have been a real good subject for a root over the rock style of bonsai, just take a good close look at the root system above the soil level and I think you would agree.

There are three varieties of Hornbeam a Korean Hornbeam Japanese Hornbeam and Common Hornbeam. I'm not sure what variety I have yet but will certainly find out after some more research.

 Hornbeam used out side of bonsai materiel are of course very popular in parks and in major cities around the globe as they do make wonderful trees for city parks and the like and they are short and squat at best and hardly ever mature to be over 30' feet and they make great additions as bonsai also to almost any one's collection. Perhaps if you visit a park or campus of some collage in your area you will find a Hornbeam growing and you could easily take a cutting from a branch with some very new fresh growth and then try and root it to make your self a bonsai.

 They will require a lot of close attention to watering in the hotter summer mounts and try not to let it dry out ever in that time of the year.  Keep it well watered and fed and you should have a nice rewarding tree for many years to come. Common Hornbeam can take the cold but the Japanese and Korean variety will do much better put into a protected area during the winter or housed over in a green house.

 This tree is deciduous and it will loose its leaves in the winter and look a little bare but oh what a show in the spring and right on through till fall. I use a well balanced all around fertilizer granular released on this and many other of my trees it works best for me however there are may varieties on the market and its only a matter of preference as to what you use but do feed all your trees through the regular growing season.

 I personally would find it best if any wiring is to be done on this kind of tree then do it in the winter on these trees as then all the foliage is gone and you can simply see what your doing a whole lot easier and take much less chance of damaging any of the nice finer foliage or limbs also be careful if you can too try and wire around bud nodes as not to damage them for any new growth coming in the next season.

 I would also make real sure you remove any wiring on the limbs before the tree starts to bud up in early spring as that is the most critical time for limbs to be growing and swelling and the wire could sink in and do damage to your limbs and not only that but leave you with unsightly wire marks and scars that would indeed take years to heal over if at all.

 Pests are unknown to me at this time for the hornbeam but if any they would be few and treated just like any other bonsai in mine or your collection. I personally use systemic on all of my bonsai as it seems to drive any bugs and or other pests away completely. Systemic may be found in most garden and nursery stores. Make sure to read the direction on package but if you do not wish to waste a lot of time reading all that tiny print just be sure to dilute it well down with lots of water added to a very small amount of the solution and add to a spray bottle and mist your tree and or plant with it and stand down wind as it really smells bad but does the job.

 I used less than a cap full of the solution and the rest water in my one quart spray bottle and it works just fine driving nearly any bug in the garden totally away and that is the intended job at least for me.  

 Pruning of this tree is done usually in mid summer for me anyway because at that time it has leafed up enough for me to see where I need to trim back and that is done on the ends of the branches making a cut of one or more leaves back too a couple of leaves and then new nodes will appear out from the two remaining leaves to make new leaves appear.

By the way the red looking flowers you see in the picture are not part of the hornbeam it is a climbing rose that is next to my fenced in garden in the front. At some point down the road if I ever get time I need to build a giant light box for taking pictures of the plants. But then I do have some bonsai that are so big that it would take more than just my self even to move them around as they are very heavy indeed, but that's another story. LOL.

 Anyway I hope you find the picture to your liking and I hope you will try a hornbeam if you have not already.

Thanks, for reading,
By: Harold Yearout ©Copyright 2024 All Rights Reserved for more information feel free to contact me: h.yearout@gmail.com


Saturday, January 04, 2014

Making your own bonsai soil

 I have to totally apologize to my readers as I had written a nice article on making up your own bonsai soil even including pictures of the products and where to get them only to have found out that yes indeed they were available last season but then when I went out yesterday in search of the same products they were not being sold any more at either of the main locations where I had purchased them before and so after some more research I found that I needed to indeed find new materials in general and just try too forget any specific brand names as company's do come and go any more so fast it seems a waste of my time looking for certain brand names.

 Bearing in mind of course that not all of us are living around big city's and sometimes its real hard for us too find what we need and want so to try and make it fairly simple I have put together a pretty basic bonsai mix and you should be able to find all these materials nearly anywhere in the world if you do a little home work and look for them.

 So with that in mind it was back to the drawing board searching out some basic material in my city with out any specific brand names. I did find what I wanted and I'm still going to pass on too you what I consider to be a very basic mix for 90% of all bonsai.

 Now to start with we have what we call Inorganic and there are organic mixes for bonsai . So what is the difference you may ask, good question so here is the answer. An all inorganic mix will consist of only rock like materials such as lava rock, crushed granite, course sands,  or pumice, of course the list can go on and on so the bottom line here is that if you wish to have an all inorganic mix then you do not wish to have any other material in the mix other than a stone or clay based substance and with no organic materials involved at all.

 While yet on the other hand an organic mix will have perhaps some peat, pine park fines, and or some other types of general compost mixed in the mix to help stimulate the plant, acting as sort of a food for the plant. Although your plants truly need none of the later if you fertilize the plants regular during the growing season and you should be doing that anyway.

 What were really trying to do here is create a mix that is fast draining and yet I do not want to sound  contradictory you also need a mix that will retain some of the water and release it later. So a good choice for an Inorganic mix is as follows.

 1: Pumice, or Red lava rock, or Decomposed granite and possibly some course sand if you like or you may in point of fact use all three of the above rock based products as I do and forget the sand.

 Now for an organic mix we will use the same as above and add some sort of pine bark or some people use Orchid bark or other type of compost material but Orchid bark is rather expensive and most people like too keep the cost down and yet still obtain a good result.

  So most other medium grade compost materials will work but bear in mind all of this material should be screened to obtain a uniform size and also to help eliminate the fines and to clean it. Now both mixes organic or inorganic will work for most all of your plants but your conifers will do better in the inorganic mix and your deciduous trees will do better in the organic mix. So then there could be argument as to why we would need both or even use both and to that I will simply say its a matter of choice rather than any necessity.

   I believe that the main thing most of us miss here is that it will depend on where you live and the climate where you live that is going to dictate what you should be using as a mix for your plants. I live in the Great Northwest in the state of Oregon and trust me here in the winter months mother nature is our constant garden hose so the key here is to get all that water out quick so the plants roots can breathe and not rot and so it makes perfect sense that water will pass through a medium based rock substance rather than be left behind in a bunch of organic bark based compost products that will retain a lot of water and stay wet for days or even weeks at a time.

 I personally use for all my tress and plants the inorganic mix and simply fertilize my bonsai on more of a regular regime and for get about the organic materials altogether.

  Now as I stated above you will want to wash all of this material to get out any dusty dirt and or other materials that are not wanted in the mix and then screen it all so you can obtain a good uniform  particle size for your finished mix. I use five gallon buckets and put all my products one in each bucket and then as I dip out each along the way and wash it screen it too get a finished material.

 I save the screened finished material in yet another bucket and what is left over is most often too fine and so it is saved and set aside for later use as a base starter mix for cuttings or seeds.

 Here is a basic set of sifting screens that I use and they consist of three sizes of screens and range from a large screen then medium and then of course a small and I always strive for the finished material to be of a medium size or about the size of a normal pencil eraser or half that size will also be alright in your mix but anything smaller should be passed on to the final screen or have totally passed through and is not wanted in the bonsai mix.

 Once you have all three of your materials in one final bucket then of course mix them all together well and your finished. So once again Inorganic mix is as follows.

 1: Pumice
 2: Red Lava Rock
 3: Decomposed Granite
 4: Optional of course is Small pencil eraser sized crushed rock of any brand or kind and or coarse sand. The mix should be not too large and not totally small either a good gauge is to lay an ordinary penny in or near the mix and the materials used should be about 1/4th the size of the coin. Here below would be what a mix should look like when finished.

  Most all conifers will need to be re-potted about every three to five years depending on the age of the plant younger trees will need to be re-potted more often while yet older trees less often.

 Deciduous trees such as maples flowering and or fruit tress will need to be re-potted every year and or every other year.

 I do not endorse or recommend any pactiular product here and only offer the items that I have wrote about as my choice of material used for my bonsai. Your products can or may be totally different, the choice and final dession is always yours to make as too what you may wish to use for your own bonsai.

 If your unsure or question if the mix is safe or good then I recommend that you only plant a very inexpensive small tree or shrub in the mix first and then follow its progress for at least one entire season and then if your satisfied that your plant survived and is doing well than it would be safe to assume that this mix is safe and can be used on a nearly any bonsai. We would further assume that now our job is done and we need not not use any other materials or search for any other, this is true too some extent however there are other alternatives and or products too research and experiment with and who knows but with time and extermination you may find or stumble on too yet another good bonsai soil mix..

 All of these products should be solid and not deteriorate or break down to any muddy substance and if for some reason they do then you have not washed it proper or purchased something other than what I have mentioned here.

Your end result is to put together a fast draining soil and still have one that will be absorbent enough to retain some of the water being passed through and not totally dry out in at least a day and if it does because temperatures are too hot and your material is drying out too fast then you will need to water more often even perhaps twice in a day in the hotter summer mounts.

Watering bonsai is a very critical factor in there survival or death so if your not sure then feel the soil and if its damp too the touch at the top of your pot then you should be alright and if not then watering may be advised. It never hurts to get your fingers dirty and scratch around a little in the soil the feel will tell you if your doing your job right, dry is a warning sign, moist is good, while mushy or soggy is a sign of too much water so just practice you will get the hang of it.

Thanks, for reading,
By: Harold Yearout ©Copyright 2014 Harold Yearout All Rights Reserved for more information feel free to contact me: h.yearout@gmail.com


Friday, December 27, 2013

The Yixing Tea Pot

 One of my favorite things to collect other than bonsai of course are other Japanese and Chinese items that truly only most collectors would appreciate and collect.

 I have always loved tea and of course I drink it a lot and although I drink mostly organic and or herbal teas as I do not like the caffeine in the teas most commonly found in the local grocery. I do however buy special teas found the world over and enjoy most all of them.

 As a collector I started collecting these special tea pots about two years ago and have several now in my own private collection and enjoy them on display because of some of the truly awesome styles and ornate carvings that they have on them.

 The Yixing Tea Pots originated from china and were made from the clay in the Yixing area in Eastern China in the province of Jiangsu and the clay is sometimes called purple clay and does come from Yixing China.

 These pots and the tea drinking practice from them dates clear back to the 15th century and truly tea drinking personally or as a ceremony can still be found today the world over.

 Although unless you have really deep pockets do not hope to find or buy an original Yixing of that time period any time soon. Although you can still purchase Yixing Tea Pots for your self because they can be found in many different locals all over the world and if you do your own research you will find them.

 I personally will not promote any special place to purchase them or find them here as that is not what I intended in this article, more over I did want to let you know that they are indeed a very nice collectible and that they are in point of fact more desirable for tea drinking than your normal or average tea pot simply because of there unique qualities and ability to absorb the flavors.

 Now what is special about these tea pots you might ask? Well its that being of this special absorbing  clay substance that allows these particular tea pots too absorb the flavor of the tea being consumed from that tea pot.

 It is very important that if you do purchase one for your self be sure only too use one type of tea per pot and never mix or brew any other type of  tea in that pot ever. This will allow that particular tea pot a chance to absorb only the flavor of the tea being used and eventually in time it will permanently do so. Then it will also become seasoned too that flavor and special aroma for the entire time you use it.

 It is said that if indeed you only brew one type of tea for that pot for many years eventually it will take on the flavor all on its own not even requiring that you use tea grounds or leaves any more to brew that tea. Simply add your hot water and let it steep until its ready brewed and then enjoy.

 Although I can not attest to this personally as I have not had any of my pots long enough or ever used them enough yet to have had this so called phenomenon happen. There are people that do swear by it though and say its absolutely possible given time.

 Another way to of course heighten the entire process in my opinion would be to submerge the entire tea pot in the special warm tea in a much larger container so as to cover the entire tea pot in the liquid and then just let it sit for several hours as the clay material from that region is very porous and will absorb naturally any of the flavor and aroma of the teas used.

 Makes sense given the nature of the tea pots made of Yixing clay. Pictured above are some Yixing Tea Pots and styles and this picture is from public domain and not mine. There are many pictures too be found on the internet and so enjoy looking around and perhaps you will find your own special pot and treasure.

 One of my favorite teas in these pots is Money Pod Picked Oolong very expensive tea too say the least given where and how it originated. The monkey picked Oolong tea got its name literary because it was picked by monkeys yes sounds phoney I know but trust me it did actually happen long ago.

 As the monks in areas of China planted the tea trees they never expected the tea trees to grow to such tall heights so as the tea trees continued to grow even taller the monks could no longer pick the most tender leaves and or even begin to reach them.

So guess what?

Well the monks actually trained monkeys to go to the top of the tea trees and pick the most desirable leaves for them and in turn the monks fed and cared for the monkeys so it was a win win for both involved. That then is how we arrived at the name Monkey Picked.

 Now I doubt that this particular practice is still being carried out today by monkeys however we still do have a tea called Monkey Pod Picked Oolong. This is a very fine tea and if you ever get the chance when out and about then try some but this special tea is not to be confused with all the other Oolong teas available. There are cheep Oolongs and there are expensive ones so buyer beware of what your purchasing.

Here are some of my most recent Yixing tea pots purchased. Never mind part of my kitchen stove in the background but anyway this gives you some idea of whats out there to collect and enjoy if you have the desire too.


 Please also bear in mind because of the nature of these special pots never use them in a Microwave oven and do not wash them out with any soap as this will truly destroy the flavor absorbed and ruin the pot for any further use and if by chance you use a tea bag in the place of natural leaves and or products then be sure to remove your tea bag from the pot as soon as it has steeped never leave tea leaves or bags in the pots after use as it will cause mold and also ruin the pot simply let it dry out naturally and then replace the lid and wait till the next use.

 The best natural way to brew special teas for these pots is to heat your water to the desired temperature for steeping the tea and use a glass container of some sort to heat the water in and if you can stay away from your city's tap water by all means use a bottled water for better taste and purity.

 In time when your brewing special teas you will learn that some will need to be hotter than others while some if you get them too hot it will also destroy the flavor and make the tea bitter and not very good tasting at all and believe me it takes a little effort to make just the right pot and get just that right taste but in time you will get the hang of it. Then its all worth it on a cold winters night like tonight to sip a lovely tasting special imported tea as you sit back relax and enjoy your evening.

Thanks, for reading,
By: Harold Yearout ©Copyright 2013 Harold Yearout All Rights Reserved for more information feel free to contact me: h.yearout@gmail.com