Wednesday, December 28, 2005

The joys of a table top fountain


The Joy of a table top fountain

One of my favorite things everyday as I work in my office is the fact that I can listen to the soothing sounds of water trickling out of the dragon's mouth and then dropping down onto some pebbles continuing on into the main pool of water. This is just one of my favorite table top fountains

I have always enjoyed fountains in my main garden at home but just recently I decided that I would add a table type fountain to my office at work and enjoy the sounds of the water all day as I work.

My job requires that I process and do a lot of paper work every day and most of the work is done on the computer. However this work at times can be very boring and take up a great deal of my time.

To help relax me and to help break up the silence of the day I keep my fountain running and it really has made a difference.

I'm lucky in a way I guess because I do not share my office with anyone and I have it all to myself. I do not work in an environment of the cubicle office like so many office workers do. My office is rather large and I have it filled to nearly capacity with indoor bonsai plants and other items that I enjoy.

Many have remarked about my office looking like a small nursery and I just laugh because to me they are just my plants and I enjoy having them around me all the time to see and tend to when I'm not working.

But I guess to my coworkers and others that have visited my office it probably does look very over crowded with bonsai plants as there are nearly forty of them in my area at work in various places.

I guess the point of all this is to tell you that if you can at all get your boss to let you add one of these small table top fountains to your work area then by all means do so as they are very relaxing and help the day go by. Not to mention they add a little beauty and also help to personalize your work area.

Most of the table type fountains usually have a little room left over where you can add some plant life to it and that will also begin to create a better effect for you and your passers by to enjoy.

There are many to choose from in the market place and styles and designs are most often of a personal preference. You could spend hours looking for the right one and in doing so pass many different ones by. But when you do see the one you fall in love with you will most likely just have to have it as these little fountains are almost always an impulse buy.

Since I'm into bonsai and frogs are part of the culture with the Chinese and Japanese so I most recently choose a fountain that displayed frogs and I love it. Of course dragons are also a part of the culture in some ways so I also enjoy my main fountain that has two bowls and a dragon in the center that dispenses the water.

I just yesterday added my new frog fountain as it is a little smaller than my dragon fountain and fits wonderfully on my desk right where I hear it well and also so that I can view it.

These fountains need not be expensive you can pick up a nice one in many shopping areas for under fifty bucks and get a life time of enjoyment out of your investment.

If you would like to see the frog table top fountain then I have added a picture to this post for you to view. If you like this fountain and would like to have one then contact me I can get one to your door in most parts of the country for $46.95 like I said under fifty bucks and that includes shipping and handling.

This style frog and lily pad designed fountain comes with pump and UL approved cord the decorative stones are not included. The size is 11 1/2" x 10 1/2" x 7" high. Four froggy friends grab a cool drink of water from the cup of a lilypad leaf. A treat to behold indoors or out! Pump included. The material is Alabastrite. Ul recognized. 11 1/2" x 10 1/2" x 7" high.

If frogs are not your cup of tea then by all means keep looking till you find your favorite table top fountain and then grab it up and enjoy it because there really is something about hearing the sounds or water moving that will do wonders for your day trust me about this one.

Just to let you all know this will be my last post for the year 2005. My first article for the year of 2006 will be the creation of an upright bonsai one of the main styles of bonsai.

I look forward to writing many new articles for you in the coming year and I hope you enjoy the Living Bonsai and More and will return often to read my ramblings and posts.

Here is wishing each and every one a very happy NewYear and a very fantastic 2006.


Thanks for reading and viewing.
By Harold Yearout

Thursday, December 22, 2005

Abundance of Golden gate Ficus


Hi to all of my readers I have put together a very special offer for all of you that might be interested in getting started with collecting bonsai.

I have this year a real over abundance of Golden Gate Ficus and I need to make more room in my green houses.

So my need to make this necessary room can be your opportunity to get one of these plants that have been trained already for nearly seven years.

Although it is too late now to get one for the Christmas season you can still get one for your self or a friend and enjoy it for years to come.

I have taken a picture here of what these plants look like but please remember that each plant is in a way almost like a person and they all have there own slight differences. They vary little from plant to plant and the plants will not be much at all different from the one you see here in this picture.

Your plant might be larger but never smaller and it could vary slightly in the trunk curve and be even more curved for added beauty. What may be different if anything at all might be the pot size and color as I have so many of these Ficus that I could not possibly take a picture of each one.

So you may see a blue pot in the picture but you may receive a plant that could very well be in a brown pot or a tan colored pot or green you get the idea. The picture here simply can not do justice to what these wonderful Ficus are really like and the beautiful looking markings in the trunks and the fantastic bright green of there leaves.

With your added attention and continued care these Ficus plants will grow on to be one of your favorite bonsai in time and surly they will command the attention of anyone who sees one of these plants in your collection.

If you are at all interested in getting one of these plants then contact me with your shipping details and I will ship one to you as fast as possible. Usually from the time I get the order and the plant gets into your hands takes about a week and a half total turn around time.

I only ship a couple of days during the week so as to avoid any time that the plants might get held over a weekend sitting in a UPS truck or warehouse in which case they might dry out and then it would not arrive to you in the best of health and so I always ship as fast as possible and most of the time by three day air select.

One of these Ficus can be shipped to you including shipping and handling for only $44.95 and believe me that's a real bargain as these Ficus are about 7 to 10 years old and even if I do toot my own horn I think that there just absolutely beautiful.

Your plant will be delivered to you packaged carefully to avoid any spilliage of the earth it is potted in and to you will also receive plant care instructions for your plant.

Thanks for taking a look and have a wonderful and healthy holiday and return as always in 2006 for more articles and bargains on my favorite of all plants the wonderful living bonsai.

Oh and PS: If you would like to really ensure that your plant gets delivered right into your hands at your door step then it is wise to require a signature other wise UPS will simply drop the package at your door and drive a way.

If this is not practical because you may be at work and not at home then simply ask your employer if you can have it delivered to you at your work place. This would also alleviate the need for your signature.

UPS now charges $2.00 more per package for required signatures. The package is automatically insured so no worry there.

Respectfully yours, Harold Yearout

Contact me at h.yearout@gmail.com with the subject line of purchase bonsai:

Tuesday, December 20, 2005

Creating your very own wild flower garden

Creating your very own wild flower garden

A wild-flower garden has a most attractive sound. One thinks of long tramps in the woods, collecting material, and then of the fun in fixing up a real for sure wild garden.

Many people say they have no luck at all with such a garden. It is not a question of luck, but a question of understanding, because wild flowers are like people and each has its very own personality.

Please be aware that what a plant has been accustomed to in nature it desires always. In fact, when removed from its own sort of living conditions, it most often sickens and dies.

That is enough to tell us that we should copy nature herself. Suppose you are hunting wild flowers. As you choose certain flowers from the woods, notice the soil they are in, the place, conditions, the surroundings, and the neighbors.

Suppose you find dog-tooth violets and wind-flowers growing close together. Then place them the same way in your own new garden. Suppose you find a certain violet enjoying an open situation; then it should always have the same conditions in its new garden. I hope you see the point, I’m trying to make here.

If you wish wild flowers to grow in a tame garden then make them feel at home. Cheat them into almost believing that they are still in their native haunts.

Wild flowers ought to be transplanted after blossoming time is over. Take a trowel and a basket into the woods with you. As you take up a few, a columbine, or a hepatica, be sure to take with the roots some of the plant's own soil, which must be packed about it when replanted.

The bed into which these plants are to go should be prepared carefully before you make your trip to collect. Surely you do not wish to bring those plants back to wait over a day or night before planting. They should go into there new quarters at once. The bed needs soil from the woods, deep and rich and full of leaf mold.

The under drainage system should be excellent. Then plants are not to go into water-logged ground. Some people think that all wood plants should have a soil saturated with water. But the woods themselves are not water-logged. It may be that you will need to dig your garden up very deeply and put some stone in the bottom.

Over this the top soil should go. And on top, where the top soil once was, put a new layer of the rich soil you brought from the woods.

Before planting water the soil well. Then as you make places for the plants put into each hole some of the soil which belongs to the plant which is to be put there.

I think it would be a rather nice plan to have a wild-flower garden giving a succession of bloom from early spring to late fall; so let us start off with March, the hepatica, spring beauty and saxifrage.

Next comes the month of April bearing in its arms the beautiful columbine, the tiny bluets and wild geranium.

For May there are the dog-tooth violet and the wood anemone, false Solomon's seal, Jack-in-the-pulpit, wake robin, bloodroot and violets.

June will give the bellflower, mullein, bee balm and foxglove. I would choose the gay butterfly weed for July. Let turtle head, aster, Joe Pye weed, and Queen Anne's lace make the rest of the season brilliant until frost.

Let us have a bit about the likes and dislikes of these plants. After you are once started you'll keep on adding to this wild-flower list.

There is no one who doesn't love the hepatica. Before the spring has really decided to come, this little flower pokes its head up and puts all else to shame. Tucked under a covering of dry leaves the blossoms wait for a ray of warm sunshine to bring them out.

These embryo flowers are further protected by a fuzzy covering. This reminds one of a similar protective covering which new fern leaves have. In the spring a hepatica plant wastes no time on getting a new suit of leaves. It makes its old ones do until the blossom has had its day.

You will find hepaticas growing in clusters, sort of family groups. They are likely to be found in rather open places in the woods. The soil is found to be rich and loose. So these should go only in partly shaded places and under good soil conditions. If planted with other woods specimens give them the benefit of a rather exposed position, that they may catch the early spring sunshine.

I should cover hepaticas over with a light litter of leaves in the fall. During the last days of February, unless the weather is extreme take this leaf covering away. You'll find the hepatica blossoms all ready to poke up their heads.

The spring beauty hardly allows the hepatica to get ahead of her. With a white flower which has dainty tracings of pink, a thin, wiry stem, and narrow, grass-like leaves, this spring flower cannot be mistaken. You will find spring beauties growing in great patches in rather open places. Plant a number of the roots and allow the sun good opportunity to get at them. For this plant loves the sun.

The other March flower mentioned is the saxifrage. This belongs in quite a different sort of environment. It is a plant which grows in dry and rocky places. Often one will find it in chinks of rock. There is an old tale to the effect that the saxifrage roots twine about rocks and work their way into them so that the rock itself splits.

Anyway, it is a rock garden plant. I have found it in dry, sandy places right on the borders of a big rock. It has white flower clusters borne on hairy stems.

The columbine is another plant that is quite likely to be found in rocky places. Standing below a ledge and looking up, one sees nestled here and there in rocky crevices one plant or more of columbine. The nodding red heads bob on wiry, slender stems. The roots do not strike deeply into the soil; in fact, often the soil hardly covers them.

Now, just because the columbine has little soil, it does not signify that it is indifferent to the soil conditions. For it always has lived, and always should live, under good drainage conditions. I wonder if it has struck you, how really hygienic plants are? Plenty of fresh air, proper drainage, and good food are fundamentals with plants.

It is evident from study of these plants how easy it is to find out what plants like. After studying their feelings, then do not make the mistake of huddling them all together under poor drainage conditions.

I always have a feeling of personal affection for the bluets. When they come I always feel that now things are beginning to settle down outdoors. They start with rich, lovely, little delicate blue blossoms. As June gets hotter and hotter their color fades a bit, until at times they look quite worn and white.

Some people call them Quaker ladies, others innocence. Under any name they are charming. They grow in colonies, sometimes in sunny fields, sometimes by the road-side. From this we learn that they are more particular about the open sunlight than about the soil.

If you desire a flower to pick and use for bouquets, then the wild geranium is not your flower. It droops very quickly after picking and almost immediately drops its petals. But the purplish flowers are showy, and the leaves, while rather coarse, are deeply cut. This latter effect gives certain boldness to the plant that is rather attractive.

The plant is found in rather moist, partly shaded portions of the woods. I like this plant in the garden. It adds good color and permanent color as long as blooming time lasts, since there is no object in picking it.

There are numbers and numbers of wild flowers I might have suggested. These I have mentioned were not given for the purpose of a flower guide, but with just one end in view your understanding of how to study soil conditions for the work of starting a wild-flower garden.

If you fear your results, then take but one or two flowers and study just what you selected then you can move on to others. Having mastered, or better, become acquainted with a few, add more another year to your garden. I think you will love your wild garden best of all before you are through with it. It is a real study, you will see once you try.

Thanks for reading.
By Harold Yearout

Creating a Raft Syle Bonsai

Nearly any species of tree could be used for a raft style bonsai but you’ll have more luck if you stick with material that is as pliable as possible.

Simply because you will need to bend and push things around quite a bit when you’re creating your raft style bonsai you'll be working with the tender limbs and trying to position them and move them where you want them as much as possible creating less work in the long run.

Some good sound choices for this style of bonsai would be yew, pine, or perhaps even Japanese maple or you might want to try an elm. There are others that would work and have worked but these would be my first choices and especially for the beginner creating this type of bonsai for the first time.

You will want to hunt for a tree that is fairly tall as this will afford you a fair amount of limbs to choose from and understand that you will only be using one side of your trees limbs for the raft so look for the side that has the most suitable limbs in your opinion as this side will be your raft.

Now we will want to trim the entire tree and then after words remove the limbs from the opposite side of which we chose to be our raft. Now lay the tree down on to a bed of soil in a fairly over sized planting box. Be sure to leave your tree still in its original pot and soil.

At this point it should resemble a row of trees pointing upwards from your remaining branches.

Now you will want to make cuts into the cambium layer of your tree trunk at about 1 inch intervals and then try to insert a small pebble to hold this area open a bit and also dress these scars with a rooting hormone powder. This is perhaps the hardest part of creating your raft planting.

Now your ready to remove the pot from the base of your tree and then tie in the roots of the tree to your planting box then cover up the trees branch as though it were the trunk for all of your trees because really it is.

However above the soil it really will resemble a group or row of trees at this point and this is the effect your trying to create.

Cover about two inches of soil over the trunk and then you can begin to wire the limbs if you want at this point and try to keep your biggest and most heavy looking limbs towards the front and the smaller limbs at the back this will add perspective to the entire planting.

Once you have this all accomplished and hopefully nothing has gone wrong and your tree is planted then all you need to do is sit back and wait for roots to form along the cuts that you made in the cambium. This could take a long time perhaps even a couple of years.

During this time take especially good care of this tree as you want to have success with your new raft planting. Keep it shaded in the hot days of summer and mist it regular and also feed as with any other bonsai.

It takes a long time to develop any good bonsai and especially one that is good looking and attractive. So just work with it and treat it like any other of your bonsai and you should have success.

In the mean time you can be thinking of how you want the whole raft to look after it is has grown for a season or so and is well established. Once it has its new root system developed then you could remove the old root and begin thinking of a pot that will work for your new loved bonsai.

Now of course pot selection is always a matter of preference and choices can be varied but you’ll at least want a pot that is large enough to give your bonsai room for expansion and yet not be out of proportion to the tree.

I like to choose either a nice large round shallow pot or one that is oval if possible or even better yet if you can afford it a nice slab type container would even be better.

Once I have selected a nice container then I will wait till the right time of year preferably spring and then I will replant my entire raft of trees in its new pot and then begin my real magic of creating it into the look of a landscape.

I will cut out some of the branches now to enhance a look of distance between trees and I will add moss where I can and then perhaps a small rock or two to add to the effect.

I will then train each individual limb as it were a completely separate bonsai tree and in time work at developing trunk and canopy accordingly for each tree in the raft.

As you work with your bonsai don’t be in hurry as it will most likely take you another couple of years to really begin to see the look of a small forest of trees but it will happen with time and your creative ability.

Thanks for reading.
By: Harold Yearout ©Copyright 2005 Harold Yearout All Rights Reserved for more information feel free to contact me:

Saturday, December 17, 2005

The Japanese Dwarf Garden Juniper

Better known in the bonsai world as Juniper Procumbens Nana


This lovely shrub is great for bonsai and especially for the beginner its low growing habit is great for creating a cascading bonsai and can be developed in a short time.

This material has been very miss used by many different sellers and other people displaying starter bonsai and even beyond in malls and other places where you might not normally expect to find bonsai for sale.

Good bonsai are normally sold by nurseries or people that specialize in this type of plant material and not in some mall out in the middle isle from a booth.

Don’t get me wrong sometimes you may find a really good buy in one of these types of places but most often I would be very careful.

Most of these sellers will simply slap one of these tiny starter plants into a pot and then call it bonsai. Buyers beware.

Such is not the case. It takes a few years to develop a nice bonsai and even with this material you’ll spend some time and have1 to do your homework if you really want to create a nice one.

This material however can make a wonderful bonsai and can be accomplished with very little efforts on the grower’s part if only you will follow a few simple guide lines.

Look for a plant in a nursery that is from five to seven years old and that has already been established and grown some nice branches for you to choose from and work on.

You can expect the price to be from around $9.95 when on sale to somewhere around $25.00 depending on the size of the plant and the amount of growth it has developed.

These plants can be found in nearly any fine garden establishment around the entire world.

If you want to work on your plant such as wiring or training of the branches this is best done in the fall when the plant goes dormant. If you do wire or train at other times of the year you will have to be very vigilante that you do not scar your bark and break the branches.

The branches will then have all winter to become accustomed to there new position. You will want to keep up with regular pinching of new growth of these plants during the growing season and please do pinch out the new growth and do not cut it out with scissors as this will turn your needles brown and make your plant look unsightly.

Pinching only encourages the plant to grow more vigorous and it will be come a lot more compact and not nearly as leggy looking on your branches.

All you need to do is grasp the new growth between your fore finger and your thumb and slightly twist and the new shoot will easily break away from the mother plant.

Eventually your aim is to try and create pods as I call them and let these cascades down for a very nice visual appearance. In other words a nice looking branched cascading arm with clusters of rounded or an elongated looking pods.

Fertilize your plant from early March till June and then stop feeding as you will not want to risk fertilizing this plant in the heat of summer as you may kill it.

The Juniper will tolerate full sun and can go a little on the dry side but as with all bonsai you will never want your plants to completely dry out; this simply is not good at all for any bonsai and most often will spell disaster.

The juniper likes to be sprayed or misted every day during the normal growing season from around June till September and in most areas it will begin to start its winter nap during the month of late October or even in to November.

You will need to repot your bonsai about every one to two years and at repotting time you will want to gradually remove about one third of the entire root growth but not at all once.

Do this over say two or three years and then once you have a nice established plant you’ll only need to transplant it about every five years or so.

Do not keep these plants indoors for long periods as they are indeed an outdoors bonsai. Others will try to convince you that it will simply grow just fine indoors. I’m here to tell you they are wrong.

Plants that are used to being out doors all the time simply will not do well indoors that’s just the way of it. By bringing those into your home you’re setting up a almost instant death for the plant.

These plants are simply used to being outside in the elements rain, wind, cold, and the like and once they acclimate to these types of conditions and then you try and change the conditions by bringing the plant in doors you will most often kill your plant.

This is not to say that you can’t bring your plants indoors for a short while to enjoy them because you can. But then you must return them to the garden or patio or where ever you’re growing them outside or expect disaster.

If you’re interested in trying your hand at one of these fairly simple to grow and tend bonsai then I would recommend that you get a nice starter from your local nursery during the growing season, or you may wish to get one from an auction if you do not want to wait. Or you can purchase a plant that is already growing and been pre trained to some extent.

Here is an auction link for you to take a look at if you want a plant you can hold over till spring and then begin work on, just click the link to take a look at this material. Simply click on the link below.

Click here to see the auction

If you want to perhaps purchase a plant that has already been established and some what pre trained then look at my link below. At my link you can take a look at a couple of plants that I have for you. Clik the link below to view the material.

http://www.bonsainmore.com


Thanks, for reading
By: Harold Yearout
©Copyright 2005 Harold Yearout All Rights Reserved For more information feel free to Contact Me:

Sunday, December 11, 2005

Bald Cypress starter trees in a forest planting


Here are some bald cypress that I bought this last year close to the end of the season and it was simply to late to do much with them at that time other than put them into a pot and keep them until spring rolls around again.

I will begin to create a forest planting with these young starter tress this next spring and I will work them into a nice shallow pot at that time suitable for a penjing style type bonsai planting with some rock and other small materials.

I will at that time repost these same trees after I have transformed them into a nice forest type bonsai planting.

But at least you can get some what of an idea what you could do with these lovely trees by creating your own forest planting.

Please note that these pictures were taken while these trees still had there needles and they do not look like this at all now because they have lost all of there growth for the winter months.

But I wanted you to be able to see what these trees look like during the normal growing season and not in the winter months. They are now bald of there beautiful needles as there name implies bald cypress.

If you have any questions that you are unsure about of or would like my help with in any way with this type of project or any other that centers around bonsai feel free to ask me here or contact me.

You'll have to wait until spring to create one of these wonderful forest plantings but trust me you will have a fantastic looking starter bonsai if you do.

If you would like to try your hand at one of these beautiful type of plantings and create your very own great looking bonsai forest then check out a fantastic offer that I have found for you today go right now and chek it out. Simply click the link below.

Out Standing Bald Cypress Starter Offer


Thanks, Harold Yearout

The Bald Cypress bonsai


It has been touted that there are cypress that are eight hundred to one thousand years old. I can not attest to that simply because I have never seen one that old.

However there most likely are some that are that old. The bald cypress is called that because they will begin to shed there needles in the early fall and will remain that way until the next spring thus the tree looks bald.

In early March April or sometimes May the tree will begin to bud up again and get its needles back and will remain until the fall again.

These beautiful trees love to be wet and they are most often found in very swampy areas however they can also survive in soil that is not kept wet.

The cypress will do well as a bonsai if kept in a fairly deep pot and kept pretty much like a bog most of the time. If left to dry out then you would have a tough time to nurse your plant back.

Cypress growing in the wild have very large flared trunks at the base and if grown as a bonsai it will take many years to get a trunk of substantial size.

You could if you wanted to field grow your plant for a few years to obtain trunk girth and then work it down to be of a size suitable for bonsai. Perhaps the most significant stands of these trees are in the state of Illinois where there are some that indeed are spectacular.

The needles are very light green and will turn orange in the fall the cypress looks like it could fit into the family of conifers but it is deciduous.

If you want to have your best luck with this type of plant for a bonsai then I would highly recommend buying some small starts and then using them to create a forest scene as in the Chinese style of bonsai pronounced as punsai or penjing or a planting that looks like a landscape.

At the beginning your plants will be very slender and not require a deep pot and will have fairly small root systems and they would lend themselves to this type of planting very well.
Select a pot that is shallow in depth but rather long and half as wide and you’ll have a good pot for your trees then always stager your trees in this type of planting just as they would look in a forest never in a row either from left or right.

The cypress can stand full sun and if you want to start more then take cuttings or learn how to graft, or simply buy more starts. They could be grown from seed but this would take you several years.

Most people are way too impatient to wait for a tree to grow from seed.

Fertilize your cypress during the normal growing season from March to late September and then slack off when the tree begins to loose its needles indicating that it is going to sleep for the winter months.

Wiring can be preformed best just as the buds begin to emerge in the early spring and you should also transplant any trees that need bigger pots at this time too.

There are many types of cypress so do not get the bald cypress confused with other varieties. This variety is Taxodium distichum and is what you should be looking for if you want this material for bonsai or for your landscape.

You can see a couple here that I have worked on now for a number of years and they are now becoming very nice bonsai.

Thanks for reading:

By: Harold Yearout
©Copyright 2005 Harold Yearout All Rights ReservedFor more information feel free to Contact Me:

Sunday, December 04, 2005

LANDSCAPE GARDENING

LANDSCAPE GARDENING.

Landscape gardening has often been likened to the painting of a picture. Your art-work teacher has most likely told you that a good picture should have a point of chief interest, and the rest of the points simply go to make more beautiful the central idea, or to form a fine setting for it. So in landscape gardening there must be in the gardener’s mind a picture of what he desires the whole to be when he completes his work.

From this study we shall be able to work out a little theory of landscape gardening.

Let us go to the lawn.

A good extent of open lawn space is always beautiful. It is restful. It adds a feeling of space to even small grounds. So we might generalize and say that it is well to keep open lawn spaces. If one covers his lawn space with many trees, with little flower beds here and there, the general effect is choppy and fussy. It is a bit like an over-dressed person. One’s grounds lose all individuality thus treated.

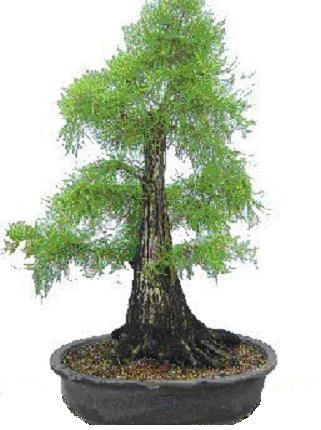
A single tree or a small group is not a bad arrangement on the lawn. Do not centre the tree or trees. Let them drop a bit into the background. Make a pleasing side feature of them. In choosing trees one must keep in mind a number of things. You should not choose an overpowering tree; the tree should be one of good shape, with something interesting about its bark, leaves, flowers or fruit. While the poplar is a rapid grower, it sheds its leaves early and so is left standing, bare and ugly, before the fall is old.

Mind you, there are places where a row or double row of Lombardy poplars is very effective. But I think you’ll agree with me that one lone poplar is not. The catalpa is quite lovely by itself. Its leaves are broad, its flowers attractive, the seed pods which cling to the tree until away into the winter, add a bit of picture squeness. The bright berries of the ash, the brilliant foliage of the sugar maple, the blossoms of the tulip tree, the bark of the white birch, and the leaves of the copper beech all these are beauty points to consider.

Place makes a difference in the selection of a tree. Suppose the lower portion of the grounds is a bit low and moist, then the spot is ideal for a willow. Don’t group trees together which look awkward. A long-looking poplar does not go with a nice rather rounded little tulip tree. A juniper, so neat and prim, would look silly beside a spreading chestnut. One must keep proportion and suitability in mind.

I’d never advise the planting of a group of evergreens close to a house, and in the front yard. The effect is very gloomy indeed. Houses thus surrounded are overcapped by such trees and are not only gloomy to live in, but truly unhealthful. The chief requisite inside a house is sunlight and plenty of it.

As trees are chosen because of certain good points, so shrubs should be. In a clump I should wish some which bloomed early, some which bloomed late, some for the beauty of their fall foliage, some for the colour of their bark and others for the fruit. Some spireas and the forsythia bloom early. The red bark of the dogwood makes a bit of colour all winter, and the red berries of the barberry cling to the shrub well into the winter.

Certain shrubs are good to use for hedge purposes. A hedge is rather prettier usually than a fence. The Californian privet is excellent for this purpose. Osage orange, Japan barberry, buckthorn, Japan quince, and Van Houtte’s spirea are other shrubs which make good hedges.

I forgot to say that in tree and shrub selection it is usually better to choose those of the locality one lives in. Unusual and foreign plants do less well, and often harmonize but poorly with their new setting.

Landscape gardening may follow along very formal lines or along informal lines. The first would have straight paths, straight rows in stiff beds, everything, as the name tells, perfectly formal. The other method is, of course, the exact opposite. There are danger points in each.

The formal arrangement is likely to look too stiff; the informal, too fussy, too wiggly. As far as paths go, keep this in mind, that a path should always lead somewhere. That is its business to direct one to a definite place. Now, straight, even paths are not unpleasing if the effect is to be that of a formal garden. The danger in the curved path is an abrupt curve, a whirligig effect. It is far better for you to stick to straight paths unless you can make a really beautiful curve. No one can tell you how to do this.

Garden paths may be of gravel, of dirt, or of grass. One sees grass paths in some very lovely gardens. I doubt, however, if they would serve as well in your small gardens. Your garden areas are so limited that they should be re-spaded each season, and the grass paths are a great bother in this work. Of course, a gravel path makes a fine appearance, but again you may not have gravel at your command.

It is possible for any of you to dig out the path for two feet. Then put in six inches of stone or clinker. Over this, pack in the dirt, rounding it slightly toward the centre of the path. There should never be depressions through the central part of paths, since these form convenient places for water to stand. The under layer of stone makes a natural drainage system.

A building often needs the help of vines or flowers or both to tie it to the grounds in such a way as to form a harmonious whole. Vines lend themselves well to this work. It is better to plant a perennial vine, and so let it form a permanent part of your landscape scheme. The Virginia creeper, wistaria, honeysuckle, a climbing rose, the clematis and trumpet vine are all most satisfactory.

Close your eyes and picture a house of natural colour, that mellow gray of the weathered shingles. Now add to this old house a purple wistaria. Can you see the beauty of it? I shall not forget soon a rather ugly corner of my childhood home, where the dining room and kitchen met. Just there climbing over, and falling over a trellis was a trumpet vine. It made beautiful an awkward angle, an ugly bit of carpenter work.

Of course, the morning-glory is an annual vine, as is the moon-vine and wild cucumber. Now, these have their special function. For often, it is necessary to cover an ugly thing for just a time, until the better things and better times come. The annual is ‘the chap’ for this work.

Along an old fence a hop vine is a thing of beauty. One might try to rival the woods’ landscape work. For often one sees festooned from one rotted tree to another the ampelopsis vine.

Flowers may well go along the side of the building, or bordering a walk. In general, though, keep the front lawn space open and unbroken by beds. What lovelier in early spring than a bed of daffodils close to the house? Hyacinths and tulips, too, form a blaze of glory. These are little or no bother, and start the spring aright. One may make of some bulbs an exception to the rule of unbroken front lawn.

Snowdrops and crocuses planted through the lawn are beautiful. They do not disturb the general effect, but just blend with the whole. One expert bulb gardener says to take a basketful of bulbs in the fall, walk about your grounds, and just drop bulbs out here and there. Wherever the bulbs drop, plant them. Such small bulbs as those we plant in lawns should be in groups of four to six. Daffodils may be thus planted, too.

The place for a flower garden is generally at the side or rear of the house. The backyard garden is a lovely idea, is it not? Who wishes to leave a beautiful looking front yard, turn the corner of a house, and find a dump heap? Not I. The flower garden may be laid out formally in neat little beds, or it may be more of a careless, hit-or-miss sort. Both have their good points. Great masses of bloom are attractive.

You should have in mind some notion of the blending of colour. Nature appears not to consider this at all, and still gets wondrous effects. This is because of the tremendous amount of her perfect background of green, and the limitlessness of her space, while we are confined at the best to relatively small areas. So we should endeavour not to blind people’s eyes with clashes of colours which do not at close range blend well. In order to break up extremes of colours you can always use masses of white flowers, or something like mignonette, which is in effect green.

Finally, let us sum up our landscape lesson. The grounds are a setting for the house or buildings. Open, free lawn spaces, a tree or a proper group well placed, flowers which do not clutter up the front yard, groups of shrubbery these are points to be remembered. The paths should lead somewhere, and be either straight or well curved. If one starts with a formal garden, one should not mix the informal with it before the work is done.

If you would like a little help with the whole process then there are a couple of fine books that I highly recommend that you read and study. Now you will not be able to carry these books very easy to the garden but they are both very good and especially the one about garden plants from A to Z.


So check these out today and if you want or need more then there are others that I can recommend.

Thanks for reading: BY Harold Yearout

Saturday, December 03, 2005

Shohin Bonsai


shohin
Originally uploaded by silverone55.
This is a tiny Shohin Bonsai. In Japan the word Shohin means tiny thing.

This is indeed a tiny bonsai the entire tree is less than seven inches from the bottom of the pot to the top of the tree.

Planted in a pot that is less than one inch around and about one and a half inches deep.

The material is Chinese Sweet Plum.

These tiny plants require that the owner pay very close attention to the watering needs of his or her plants as these small plants will dry out very fast.

Please read the entire article below to learn more about Shohin bonsai.

Tuesday, November 22, 2005

The creation of small shohin bonsai

I have been creating and enjoying bonsai for many years now but I have always hated the word miniature when referring to bonsai. Bonsai in my opinion are not miniatures.

There is one type of bonsai however that is very small and that is the shohin and in Japan the word shohin means tiny thing.

When someone looks at a regular bonsai planted in a pot and thinks that it is miniature or small or dwarfed then they may be right to a degree. However the art and idea of bonsai has been based upon a sound principal of horticulture and creative art for hundreds of years.

And although the viewer sees the bonsai as miniature or dwarfed the plants are really only creations that have been styled and trained by there owners to resemble the same exact type of tree that you might see in any forest any where around the world.

The one real difference is that the bonsai has been trained to live in the smaller confines of a pot or tray by the way the owner has clipped, trimmed, wired and trained not only the trunk and branches but also the entire root system of his or her tree.

Now let’s take into account the shohin bonsai and its size. If you thought that a regular bonsai was small or miniaturized then you would really be shocked if you were to see a shohin bonsai.

Because the art of shohin is that of creating a bonsai that is no more than ten inches tall over all from the base of the pot to the top of the tree.

Not only that but the entire tree and pot should easily fit into the palm of the hand and that my friend is small. And believe it or not I have seen bonsai that were so small that they could fit into a sewing thimble.

Some of the main differences between the shohin and regular bonsai are of course the size and shohin are very small in compression but just as fun to create and as nice and lovely to look at.

If you want to create and grow a shohin you will need to take its size into account in many ways. Most noticeably would be watering, feeding, location, temperature, pot size and of course the material and plant size you want to work into a shohin.

Watering is always the most critical because the plant is in a much smaller pot and has les dirt to support the root system and therefore will dry out much faster. And it should be rather obvious that you would feed this size plant less than a larger plant.


If you plan to place your finished shohin in your garden then you would certainly want to protect it from the direct sun and also keep it where it will not be blown over or off of a display bench from high winds.

The selection of material for a shohin bonsai can be nearly any woody material just like its big brothers and you could simply start looking for a nice plant in a nursery or collect one from the wild or of course grow one from seed.

The later of course taking you many years to develop the size of trunk that you would want for a nice visual affect when viewing your shohin. I would much rather start out with a plant that all ready has some girth to the trunk and simply work it down in size to fit into a tiny pot.

You can always add some moss or other material to the top of your pot to help not only create more humidity for your tiny plant but also create a more pleasant planting to view.

You can still follow the regular rules of bonsai for your shohin and by that I mean the styles need not be different nor do the pots or the soil and you will still trim, clip, cut, wire, and do all same things to these little plants as you do with your larger ones.

It would take much more room and a lot more extensive study about the art of shohin than I have room here to tell you about. So if your at all interested in this bonsai art form then you will need to look for more material here on the World Wide Web.

Simply do a search for shohin bonsai and you will find many sites, articles and books that will explain in depth what you will want to learn about this type of bonsai planting.

If your at all interested in creating some bonsai of your very own but are a little confused about how and where to start then I recommend reading and studying first that way you will have a better understanding of the whole process when you do decide to begin.

Here is a great book that I highly recommend when starting out in the wonderful hobby of bonsai. Once you have read this book there are others that I can recommend as well that will teach you even more about this most rewarding of all horticulture art forms.


By: Harold Yearout
©Copyright 2005 Harold Yearout All Rights ReservedFor more information feel free to Contact Me:

Thanks for reading my articles.

Friday, November 18, 2005

Growing Plants From Seed

Growing your own plants from seed is very rewarding and considerably cheaper than buying seedlings or plants from the shop. The first thing you will need is a box or tray approximately 3 to 4 inches deep, 12 to 14 inches wide and 20 to24 inches long.

Once you have your box it will need to be filled with a suitable seed raising mix. You have two options here, either buy a bag of seed raising mix from your local nursery or make your own. A good medium would be 80-85% washed river sand and 15-20% peat moss. Fill the box nearly to the top and then firm down using a small board.

Rows can now be made across the box. They should be one quarter to half inch deep and 2 inches apart. Pressing a piece of cane or dowel into the soil is a quick and easy way of creating rows.

The seed should be distributed 8 or 10 to the inch in the row sand then be covered. Move the box to a warm shaded place.

It is important to water regularly during germination, however the soil should be kept moist not wet. If the water starts running out the bottom of the box you're over doing it and the soil will become water logged. If this happens the seeds could rot and fail to germinate.

If you can cover the box with a piece of glass this will hold the moisture, creating a micro climate, which will hasten germination.Once the seedlings germinate the lid can be removed and the seedlings can gradually be introduced to stronger light - next to a window would be ideal.

When the plants are one inch to an inch and a half high they should be thinned to one or two inches apart in the row, so as to give them space enough to make a strong stocky growth.

If you wish to keep the plants that have been thinned, they must be planted two inches apart each way in boxes similar to the seed box.

When the weather becomes mild the box of plants should be set out of doors part of the time so that the plants will harden inpreparation for transplanting to the garden later. It is recommended to give the seedlings a good watering just before transplanting so that a ball of earth will stick to the roots.

By raising seedlings in this controlled climate of germination they will be hardier and flourish. You'll also have the added satisfaction of having done all the work yourself.

By Harold Yearout

Thanks for reading and happy planting.

Sunday, October 30, 2005

Choosing plants for your garden

I have been bitten and have had the gardening bug nearly all my life and I simply can’t help it. The garden is a lovely place to be at least for me nearly any time of the year.

I can find things to do there almost any time and if I’m not out side working in my garden then I’m inside tending my indoors bonsai.

But bonsai are not the only plants that make up my garden and for sure the average person does not even own any at all. But as the title states at the header of the page BonsaiNmore.

So Yes I ‘m simply in love with the horticulture art period and nearly anything to do with it. But please before you begin a garden take some of the tips here into consideration and think before you leap right in and get the bug.

If you take your time and plan well and do your home work you’ll have a much more pleasant experience and enjoy your garden more in the long run. Almost any one can run out and buy up some trees and plants and slap them into the ground and then later discover that they have indeed created a disaster.

Gardens like any other endeavor take planning and time to develop well.

Excited, that’s how you felt when you saw that space in your backyard. And you bought some plants, but without even considering first what kind of soil you have at your garden, or perhaps, without planning carefully what kind of plants will survive. Now your garden is a mess. Think it over.

Before buying plants you should be attentive of where are you going to place the plants in the garden - shade-loving plants for the sheltered areas, sun-lovers for the warm spots, drought-resistant plants for the parched areas which may be either sunny or shaded, and swamp plants for the poorly-drained parts. Once you decided with your selections it is time to choose how you are going to position them in your garden.

Take a look at these pointers:

What to plant

Do you want fruits, vegetables, flowers? Remember to start small; you can always increase the size of your garden if you choose to. But do it gradually. This is particularly important if you're in a budget, of course.

Test your soil first, to determine the pH level of your soil and what kind of nutrients you need to add. You can alter the garden soil's pH. However, it is a lot easier to maintain a garden without having to alter it's soil's pH level. This calls for choosing plants that will survive with the kind of pH your garden soil has.

Once you have spent some time and studied then you will have a better idea of what to purchase and when and where to plant it in your garden for the best results.

So here is to your happy gardening and many years of enjoyment in it.

Thanks for reading, Harold Yearout

Thursday, August 25, 2005

Can Anyone Create A Bonsai?

Let me answer a question with a question. Are you at all creative? Yes indeed I think most of us have a creative side but most of the time we simply do not use it a lot.

It is said that our brain is divided into two parts at least as far as the aspect of thinking goes.

And I have also read and heard that the right side of the brain is the creative side while the left side is the more dominate side and seems to try and over take when ever you want to try or do something creative.

So then the real secret is to try and concentrate and shut out the left side and let the right side do what it does best and that is create.

But getting back to the question at had can anyone create a bonsai? Well unless you’re totally disabled I would have to say the answer is yes.

But let’s take a look at the basics of what you’ll need and want to acquire before you start out to create your first bonsai.

Fist off pick a material that you really are excited about and have some interest in. I for instance have always loved maples and so that would most always be my first choice of material.

I would first pick the type of maple that I wanted to work with. Let’s say I choose Trident Maple because perhaps I have seen examples of finished bonsai in pictures or perhaps even in the real setting in a nursery and I have fallen in love with this type of maple and just have to have one.

The next thing I want to do then is to read all of the articles I can find that are free on the net and then I would make a trip to the library and see what I could scare up on this particular maple variety.

Learn as much as you can about this tree before you make your final decision. Study first before you leap because there might be something that you will read or learn along the way that will sway your decision about this material.

I have always taught that it is much better to be prepared and too no what your up against before you start out. Don’t wait until latter to find out that you really did not make a wise choice and then for some unseen reason you wind up disappointed.

Once I have done my home work then I will go out in search of a starter tree and by a starter I mean one that is already nursery grown and established in at least a one gallon pot.

You could accept a plant that is smaller in size and do well but for my self personally I prefer my starts to be at least one gallon size this way I know that they have been around for a while and survived the elements for at least a couple of seasons and personally I do not have a life time to wait until a plant begins to show some sings of being mature.

Plant that are at least one gallon size are less likely to die from movement and they will have been tended for some time already in the nursery and most likely been fed good with fertilizer and have a nice root system developed.

Next once I have picked out a reasonable plant starter then I will proceed to find a suitable pot. Now this is a matter of choice and you need not have a pot right off to start with.

In fact some bonsai masters as well as other growers will tell you that they will train a plant for many years before putting it in a final pot.

Makes sense because if you were to follow the rule of bonsai and plant the plant in a pot that is of the right size for the plant you have chosen then yours may look fine in that pot to you but will really never grow to any size at all because you have essentially all ready stopped the growth by selecting its confines.

In other words give it time to grow in a much larger pot so it will establish root structure and gain a nice size trunk and establish a nice limb growth over all. Then work the plant down into the smaller sized pot.

You will then appreciate your plant a lot more because you will have worked with it over the course of a few years and you’ll have also have learned what it entails to make that variety of plant material bonsai.

Thanks for reading.

BY: Harold Yearout

Wednesday, August 03, 2005

What's In Your Pond?

What’s in your pond?

Hi and good day to you, this article is not really about bonsai but still if you have a garden it might be of interest to you .

I have a fairly large garden and in it I have not one but two ponds and they both are active most of the year.

I believe that a nice well developed pond can really ad a nice effect to any garden and especially a bonsai garden. I have no fish in either of my ponds simply because I do not want the added work of feeding and cleaning the pond for fish or the added expense of high end filters for fish.

Not to mention that we have plenty of small varmints and critters that would feast upon the fish and have a field day at the pond if they were fish in it.

There are ways to keep the critters out and one is by adding netting to the top of your pond. However I want to be able to enjoy my water effect and to have netting in place would to me destroy the effect.

I love the flowing water and have both ponds set up so that the flow of water is very much cascading and this also makes a nice sound as the water splashes down over the rocks and then empties into the pond.

I made my first pond about four feet deep and about 5' feet by ten' feet in diameter and used a heavy rubber based liner to hold the water in. I have a pump that pumps 1900 gallons and hour on this pond and it is more than enough and keeps my pond fresh and clean even without a filter.

I learned the hard way that if you’re going to build a pond by all means try to do it with liner rather than a perform and here is why.

The perform pond type designs are attractive and nice but they do tend to contract and expand with the weather and after a short while the plastic will eventually spring a leak from a crack some where in the material.

But if you do by a perform pond type liner or already have one not to fear if it does spring a leak then simply by enough rubber liner material to go cover over your entire surface area and allow a little extra for contraction and your back in business.

Simply put the liner in place and cover the outer edges with interesting rocks and line the edges of your pond with some nice plants to hide any areas that you don’t want seen.

Some of the benefits of having a pond to me at least are the relaxation of the water flowing and trickling down over the rocks and it ads humidity to my back yard garden and also makes a nice place for the birds to take a drink and have a bath.

Butterflies love it too and the ever so tiny honey bees and not to mention frogs and toads and other little fine aquatic creatures that I know nothing about but still enjoy seeing.

Even the next door neighbor’s cat welcomes a bath and some times believe it or not sits for hours just staring into the water.

Probably looking in hopes of finding the not to be there fish.


It also provides a lovely home for my water plants and some of my trees that love a bog type setting such as my cypress and my alder trees that I have had growing there now for a long time.

There are so many nice features of having a pond that it makes me wish I could have more and if I had the space I would have more or at least have a much larger one for a more desired effect.

If you decide that you want a pond and you don’t have the space then look into trying your hand at one that can be totally self contained in a very small space even in a space as small as the diameter of a fifty gallon drum top or even perhaps in an old whisky cask or many other options the choice is all yours.

Many people have small ponds on there patios and enjoy the water effect with out even having a lot of space at all.

I have four other small pounds that are small container type in various places in my garden and I enjoy them all just for the added beauty and sound of water running that they ad.

So next time you have some spare time and a little pocket change consider a water pond for your garden or patio I promise you that you’ll always enjoy it once you have created it.

Thanks for reading,
Harold Yearout
C) Copyright 2005 by Harold R Yearout All rights reserved worldwide.

Monday, June 27, 2005


Here is a small five year old shohin Zelkova that is just starting to show some promise and will some day make a wonderful bonsai.
Posted by Hello

Zelkova Schneideriana or Elm As Bonsai

The zelkova is a genius of the elm family of plants and there are about six trees in this family and they are deciduous. The zelkova is common in North America and Northern Europe and of course East Asia.

The name zelkova is derived from one of the languages of Caucasus.

These plants occur in woodland thickets and hedge groves in Italy, Greece, Turkey, Iran, and Asia. They have an ovate to elliptic type leaf and they produce a fantastic display of fall color if left out doors they will eventually completely defoliate and loose all of there leaves until the next spring.

Many of these elms have been acclimated over the years to grow indoors as bonsai. However this plant will do much better out doors but you can grow zelkova indoors if reasonable care is taken.

The most common of the elms is the Japanese Gray bark and it is well known and grown through out the world as bonsai.

However there is no reason that some of these other species can not be grown as well and also do just as well as a bonsai.

If you do decide to grow one of these plants indoors then find a well lit and fairly cool position for it and place it on a humidity tray and mist as often as you can.

If you prefer that your plant be deciduous and loose its leaves and have a slight dormant period then try to keep the plant out side during the regular season from may till early Autumn and then begin to bring it back indoors after it has dropped its leaves.

If you prefer to grow your zelkova outdoors then you’ll want to provide it some protection from frost and extreme cold once the plant has lost its leaves it can be wintered in garages or out buildings as they do not require light once leaf drop has occurred.

Watering will be much more critical indoors than outdoors as it will tend to dry out much quicker because of a lack of humidity unless you can provide it with some sort of green house affect.

Feeding of your plant will require a fertilizer high in nitrogen early in the spring when leaf bud is forming for at least about a month then you can drop back to just a well balanced feed for the rest of the season about every two weeks or so.

Pruning of your zelkova will certainly help it to become more compact and grow much nicer for you. I always wait and allow the shoots to grow out to about four nodes and then I prune back to about one or two leaves to get a more compact look.

The zelkova will respond very well to the broom style of bonsai as this tends to be its natural growing habit anyway.

However they can be trained in nearly any style that you desire so just decide on how you want your plant to look and then just work at it till you get what you want.

You can propagate this plant by seeds or green cuttings in the summer and hardwood cuttings in the winter and air layering after the spring growth has hardened off.

Plants that have been planed in pots or trained as bonsai are pretty safe from the well known Dutch elm disease. But you may want to watch out for aphids and leafhoppers and gall mites and you’ll want to be aware of leafspot.

You can wire your elm for shape and style but be aware that the bark will scare easily and care should be taken when you wire this tree.

Thanks, for reading and viewing.

©Copyright 2005 Harold Yearout All Rights Reserved
For more information feel free to Contact Me:

Sunday, June 26, 2005


Here is a five year Ficus Retusa fig still small and still what I consider to be a starter plant.
Posted by Hello

The Ficus or Fig as Bonsai

The ficus is a very popular plant for bonsai and there are some where around 800 different species of these evergreen shrubs and trees and climbers that exist and they all are tropical and sub tropical.

The Ficus Retusa fig can make a wonderful bonsai if you simply take your time and work with this plant to get a shape and style going.

They are very tolerant of indoor growing conditions and will adept to most homes.

Most of our homes though have very poor humidity and unfortunately humidity is pretty much a necessity to the growing of ficus.

This is not to say that your fig will die or not live it simply will not grow as well or as fast if you subject it to less than the ideal conditions that they are used too.

The ideal conditions of course would be when you can provide lots of high humidity consistent watering and plenty of light.

Some things that you can do to improve the levels of humidity around your plant would be to keep it on a humidity tray and spray mist it regularly through out the day when ever possible. You might also try and pot some moss along in your pot to help retain moisture.

Some apartment dwellers may have a bathroom that does not have an outside window and If this is the case and you take a lot of showers and your bathroom steams up that’s great simply take along your fig and let it soak up all that wonderful humidity even if it is for a short while.

Since most of these type of plants are found on the jungle floor and the other taller tress block out a lot of the light they are fairly light tolerant and will adept to most indoor poor lighting conditions.

There are at least a dozen species of ficus and hundreds of varieties of figs within that species and of these there are many that can and will make a wonderful bonsai.

Try if at all possible to place your fig in a very high light condition even full sun will not harm your fig and by keeping a humidity tray filled with some small pea gravel under your plant you’ll only encourage it to grow faster and be healthier.

Of course misting will also be welcomed and you most likely couldn’t ever mist enough unless you had your bonsai all growing in a green house with a built in misting system. So you need not worry about over misting any of these plants as they all love it.

You will most likely need to repot your ficus at least every other year and feed it only during the growing season and never when it looks to be in poor health or during the winter months.

Ficus can be pruned during the spring although most will be tolerant of pruning year around as long as you’re not hard pruning and by hard pruning I mean taking a lot off of your plant.

Scale insects and mites can some times be a problem and should be watched for on your figs. Figs will leaf drop very fast if subjected to poor conditions such as over watering, or poor light, or drafts but if the conditions are improved your fig can leaf back in as little as 3 to 6 weeks.

Some of the varieties that make good bonsai are Ficus Salicifolia or willow leaf fig, the famous Ficus Benjamina of course and Ficus Retusa, or the Chinese banyan, and there is also a variety called the Green Island Fig which is also a variety of the Retusa.

Figs can se started from cuttings or seeds and of course air layering I prefer cuttings and have started most If not all of my figs in this manner.

Thanks, for reading and viewing.

©Copyright 2005 Harold Yearout All Rights Reserved
For more information feel free to Contact Me:

Wednesday, June 15, 2005

Propagating Maples

Propagating Maples

I have had many people over the years ask me the same question over and over and that is how I get maples to grow from starts. They tell me that when they try they do not have any luck.

Well let me see if I can explain how I do it and then perhaps you can too if your lucky.

I say lucky because there are so many different cultivars of maple and it seems at times that each one will have its own quirks.

I believe that there is a certain amount of just pure luck involved when you try to propagate these types of plants.

Maples can be started in a number of ways and most people will try to get them started from a cutting. This is a great way to get them started if you can really be on top of the watering or should I say misting.

The cuttings if you’re going to try your hand at getting some started in this manner should be taken in the month of June and that would of course be right now these would be called softwood cuttings.

You’re going to want the newest growth and of course that would be the new shoots that have just started this spring. These shoots will have not yet hardened
off and they will make good starts.

You’ll want the shoots to be around four inches in length and you will want the lower leaves stripped leaving perhaps a couple or so at the very end of the shoot.

You’ll want to plant them in a very course sand mix. I poke little holes in the sand with a pencil and then insert my starts and firm the sand down around each.

A rooting compound will also help and you can find either a powder type of liquid type in any good nursery or plant and garden store in your area. You would simply dip each cutting in the rooting compound right before sticking your cutting in the sand mix.

Another trick I try most all of the time is to very lightly scrape along the leaf stripped stem near the bottom and this will cause sort of a small type of wound and as the plant will almost always try to heal over this area it will then start roots where you caused the wound.

Another secret to getting cuttings started is to be able to keep them constantly misted however this is near to impossible without the aid of equipment and most people simply can not afford to invest in this unless they want to raise a whole lot of cuttings.

You could also get a lot of cultivars of maple started by the budding method and there is also grafting if your very experienced if not then just leave this method to the experts..

I will discuss some of these other methods in detail in yet another article at a later time.

You can also try seed and it should be collected once it has turned brown on the mother plant and then left to further dry out. The seed should be kept until your ready to work with it.

Most maple seed will fall off the mother plant late in the fall and most often simply just get blown away by the winter winds and such. But if a few do some how manage to get covered by some small amount of soil and other garden mulch then if your lucky they might sprout a couple of seasons later.

The reason is maple seeds have a really tough outer shell and they must lie on the ground and go through the entire process of a winter and if they survive then they might open up enough to take root and start a plant.

But I for one do not like to wait so I will try to speed along this process by fooling Mother Nature and processing the seeds myself much sooner.

I will decide on a target date that I want to plant my seed outside and that would be right after any worries about frost and that is June in most places. So then I would count backwards on my calendar 100 days and that would be some where around February.

Then I will take my seed and put it into a cup of nice hot water not boiling or anything like that but still hot.

I will then leave the seed over night and the seed that floats to the bottom is the seed that is most likely to be of use for planting. I discard the rest.

I will then take my seed and sprinkle it in a sterile planting medium wet it down good but not soaking wet. Now I will put my seed in my refrigerator in the crisper and leave it there until my target date of June.

I have now essentially fooled Mother Nature into thinking that a winter has passed and my seed should be ready to plant outdoors.

I would then pick a place in my garden and sow the seed on clean soil and cover about 3/8 of and inch with more soil and water good and wait. Let dry out between watering so as not to rot your seed before it gets the chance to germinate.

I wish you good luck with your cutting or your seed and if you do not succeed the first time keep trying you’ll soon get the hang of it.

Thanks for reading

©Copyright 2003 Harold Yearout All Rights Reserved
For more information feel free to Contact Me.

Sunday, June 05, 2005


Shohin Ligustrum: Here is a small Ligustrum started five years ago in training now for three years.
Posted by Hello

LIGUSTRUM LUCIDUM

LIGUSTRUM LUCIDUM

There are over fifty species of this privet and in some areas it is actually considered a weed and is totally ignored as anything you would want to grow.

However I think that the Iigustrum makes a wonderful bonsai material and I have worked a couple of these for my collection.

I have one Ligustrum that is five years old and it has been in training now for three years.

I’m training the plant as a shohin bonsai and it will eventually make a very nice specimen.

It takes a few years to develop the trunk for a shohin and so you must have time and patience.

The Ligustrum if left to grow outside the confines of a pot can reach heights of over thirty feet. It does well as a tree if trained to grow up right and in the style of a tree otherwise it is more of a shrub.

Most varieties have a glossy leaf and some to the point that they may look waxed. The variety that I have in my collection does not have the glossy type leaf and I’m still unsure exactly what variety that it is.

I have researched many plant books but have still not found this particular kind but of course I will continue to look. The plant can have creamy white flowers sometimes in April or May and even as late as June.

It does produce a berry but they are poisonous and certainly not for eating. I would recommend washing your hands after handling or cutting on this plant.

The origin of the Ligustrum is Korea, China, and Japan. They are very hardy and can even be a nuisance if left alone to grow unattended.

The Chinese have used this plant for medicinal purposes for many years, the berries are employed as a yin tonic in there medicine and used for many conditions.

This plant will do well indoors and can be trained in all manner of shape and style if you work at it. The limbs can get very brittle fairly fast so if you plan to wire this plant then you must start when the limbs are young and still pliable.

This plant has been used widely for hedge type separation of yards and has also been used as a common tree in street plantings for years.

Care of this plant is fairly straight forward; it can be encouraged to branch by continued pinching and cutting back of new growth. You’ll need to water your Ligusturm Privet often as they will dry out fast especially as bonsai.

Plant in a well drained soil to prevent root rot and faster draining of any excess water. The plant can withstand full sun or part shade, and you’ll need to repot this plant nearly every year as it grows fast and can get root bound in a hurry.

You can easily propagate this plant from softwood cuttings or grafting or from seed. Some times the cuttings will even root in just water.

A general purpose fertilizer will work for this plant just fine and you should feed it during the season from spring till early fall and then let it grow on its own until the next season before fertilizing any more.

Some of the pests for this plant are aphids and spider mites white fly and of course root rot.

The leafs of the Ligustrum will tend to droop and wilt fast if your under watering and after a while you’ll get the hang of its watering needs. Shohin bonsai are extremely prone to drying out fast as they are in very tiny pots in almost all cases.

The idea of a Shohin is to try and develop a very nice large trunk and still have the entire plant in a small pot and have the plant not over ten inches in total height.

I sometimes have to water my Shohin twice a day even inside. I keep a very close watch on these little plants and really love all of them.

If you decide that you would like to try your hand at growing one of these plants then you can most likely find a nice start at one of your local nursery or if you like you can take a look on one of the bonsai sites on the net and most likely find a nice one.

Thanks for reading and viewing. Harold Yearout
©Copyright 2005 All Rights Reserved
For more information feel free to Contact Me.

Sunday, May 29, 2005


This is a tiny starter of the lace leaf maple described in the article below.
Posted by Hello

Acer Palmatum ‘Goshiki Shidare’

This particular variety of lace leaf has variegated leaves and is one of the harder to find maples. The leaves are a deep red with a light salmon color variegated through out the leaf.

I got my hands on a couple of these in a local nursery this weekend and I’m thrilled. It will take many years to develop this little starter plant into a bonsai.

But I have the patience and hopefully the time so I will surely try. I seem to be drawn to maples for some reason my collection has many now and I still keep looking for more.

There are so many cultivars of maples that you could collect for many years and still probably not have all of them. However if maples fascinate you like they do me well then you can certainly obtain many and have a wonderful collection.

Lace leaf maples are among the most beautiful of all the maples in my opinion. And you do not find them as bonsai in a pot very often.

I think that perhaps the reason that you do not find them is because most of these types of maples are grafted and I for one do not like to start out with a grafted plant for a bonsai.

The people who graft this type of plant always seem to graft the start really high on the plant and this makes the whole thing look rather leggy and just not acceptable to me anyway.

But then we have to also understand that the nursery business is not grafting these plants for the bonsai hobby they are selling most of them to regular home gardeners and they simply do not care that the starter plant is really tall and leggy looking because after all there not going to raise it in a pot.

You can see lace leaf in nearly every yard especially in the NorthWest and since it is considered a garden favorite you'll continue to see it planted where ever it will grow.

You must be very vigilante of the lace leaf in the very warm summer months as the leaves of these and many other maples will burn very rapid and once it starts there usually is no saving the leaf.

I water always early in the morning and very rarely at night and for the reason that if I soak the plant really good in the morning it will most often make it though the day just fine.

I do not water at night because this draws out many bugs that will then feast on your plants leaves and it also tends to mold your plants at the base.

These types of maples will grow in sort of and umbrella style unless you shape it different. You will most defiantly want to protect your maple from the direct hot sun if at all possible.

This maple will do really well if planted around a pond or as a bonsai and will reward you with leaves that can be either green marked with a bronze color and or a red cast or they might be light with pink splashes and even in some cases they might have large white patches and this can all be on the same plant.

If you’re going to fertilize then I would suggest not going over board as most maples of this type seem to get leggier with a lot of fertilizer.

I personally will let the plant just grow and develop on its own and forget the fertilizer.

I have not lost any of my maples yet because of lack of fertilizer.
The plant seems to do well from zone 5a to zone 9a and if you need to see a plant zone map then you can see one at the web url below.
http://forestry.about.com/od/treehabitatandrange/ss/plant_zones.htm

You can propagate this maple by either grafting or budding or by collecting seeds after they have ripened off and dried in the fall. I will write a more detailed article on getting these and other types of maples started from seed later in another post.

Although this maple is considered to be more like a shrub it will grow to around fifteen feet if left to grow in the ground.

I have not grown one in the ground but have two of these cultivars as bonsai and I may perhaps at some later time take a cutting and and graft it in order to get one for my garden.

In the picture above you can see a small starter bonsai of this material that I acquired just this spring and in time it will make a very lovely bonsai but since this material grows very slow it will take a few years to create this one.

I will train it in the umbrella style and later when it has had time to grow a stronger trunk then I will twist the trunk around a bamboo stick to get a desired S curve look to the trunk.

Thanks for reading and looking.
©Copyright 2005 All Rights Reserved
For more information feel free to Contact Me

.

Thursday, May 19, 2005


This is a full cascade Cotoneaster only two years old.
Posted by Hello

Cotoneaster

Here is a material that is very easy to work with especially for anyone who wants to start out by creating there own bonsai.

Almost any nursery in the country will have a few varieties of cotoneaster. It grows rather rapid so if you do make a mistake and cut some off that later you wished you hadn’t well not to worry because it will produce many more fresh shoots for you to work with.

If I were going to start out brand new with this material then I would go to a local nursery and obtain a good starter plant in a one gallon pot size and then once home I would begin to study the plant to determine first where my front is going to be.

Once I have established the front of my plant then I can begin to study it to see if it has any typical bonsai shape already kind of started for me. The plant that I have pictured here was already growing a really long branch out from the main stalk.

So I simply wired the branch to obtain the full cascade look and then worked on the main growth at the center of the plant. In a cascade style you will always want your plant as close to the center of the pot as you can get it.

This is not true with nearly any other style of bonsai. Almost always with other plants in other styles you would want your plant to be off center and to one side of the pot nearly all of the time.

But with a cascade I want the plant centered and then I want the growth in the center of the plant to reach out to surround the pot almost to the edges of the rim all the way around the pot if possible.

This simply makes the bonsai look nice and full. The main cascade branch if at all possible should twist or arc if you will from side to side so as to resemble a winding brook or a nice full S curve.

The cotoneaster has blooms of very tiny flowers and some bloom with red flowers and yet others have tiny white flowers and in the fall they will spawn red berries. This is not a fruit that you would want to eat but the birds will sometimes find the berries a welcome feast in mid winter.

I will not try to elaborate too much on the care here for this plant as it is very hardy and you would have to completely and totally neglect it to kill it. Just water and feed through the season and you will have no trouble growing one of these plants.

I have several cotoneasters in my collection and most all of them have been trained in the clip and grow method and very rarely wired unless there was no other way to achieve the look that I desired.

If the plant just presents something to you right out of nature then by all means go with it other wise you’ll simply have to work at it until you get where you want with it.

You can propagate cotoneaster from seed or from soft wood or hard wood cuttings depending on the time of the year for the cuttings and seed would be best started in real early spring after any worry of frost.

You can bring your plant indoors for enjoyment a few days during the year but the rest of the time you’ll want to keep it outdoors as it is and outdoors plant material.

You will find many different kinds to choose from if you look around and some even with thorny spines on them so if you choose one of these then be careful of the fingers when working the material as these spines are sharp and will get you good if you’re careless.

I prefer these plants to teach beginners with because of there fast growing habit nearly anyone can get a bonsai going with one of these in no time at all and they are not expensive material to obtain.

You’ll find them in most nurseries from around six to ten dollars for a gallon size and this size will give you a really nice plant to begin with and you’ll already have some nice trunk size and a lot of branches to work with.

Because of the material being inexpensive it can be used to practice on and not worry to much if you mess it up because you can simply get another and start all over in no time. It usually only takes one or two years to get a nice looking cotoneaster tree created,

From there on it is just clip and let nature take its course and you have a wonderful looking bonsai in your collection in no time at all.

Thanks, for looking and reading.

Harold Yearout
©Copyright 2005 All Rights Reserved
For more information feel free to Contact me:

Monday, May 16, 2005


Just take a look at the fine detail in this netsuke. I think it is awesome.
Posted by Hello

Here is a tiny netsuke from my collection very nice detail.
Posted by Hello

Sunday, May 15, 2005

The Netsuke Can Make a Fantastic Collectable

The Living Bonsai & More is as the name implies. I personally have had an interest in most all things oriental nearly all of my life and so from time to time I will endeavor to post an article on a subject other than bonsai.

I became interested in Netsuke as a fine collectable a few years ago and began a personal collection of these little fine art carvings. But what are netsukes you may ask?

Well the Japanese term for a netsuke literally means root for fastening and the netsuke was a way for the Japanese men to carry small objects with them inside there kimonos.

Since the kimono had no pockets and was only held together by a sash called obi around the waist then it would be impossible to carry any small objects around with you during the course of your day.

Thus the netsuke was derived some where possibly around the 16th century and was used as a device to act as a sort of a weight to hang down from the sash and thus keep the pouch from slipping away from the sash and kimono.

There would be a small pouch attached with strings and inside the person could then carry small items along.

They might have had there tobacco and pipe or some writing tools or a small purse and even medicines inside the pouches and these were then carried with the help of the netsuke.

The netsuke traditionally had a small hole through the material and then most often a silk cord attached and the cord was then drawn up under the obi or sash and the netsuke then would hang over the front of the sash keeping the pouch in tact.

The art of netsuke was a fine craft and the carvings were very elaborate and a lot of the time a person’s wealth or status could even be told by the look of the netsuke that adorned the kimono.

As time passed and the Japanese began to look to the western world for dress and the netsuke faded into a lost feature of clothing that was no longer needed so to speak. However the netsuke has always been highly prized as a collectable.

It’s so easy to get hooked on collecting these beautiful marvels of artistic carving once any person holds one of these little master pieces of carved art in there hands the first time there usually hooked and begin collecting.

The western world began to get there hands on these small carvings some time after 1853 when Commodore Perry’s black ships first dropped anchor in Uraga showing the American flag.

There was a trade agreement signed by America and Japan giving America a trade monopoly for many years to come and American sailors mostly from New England who were whalers began to bring back many of these carvings to the western world and by the 1870s collecting had begun.

Even yet today these carvings are still very much sought after and some of the best collections are not in Japan but actually right here in the United States.

Netsukes were carved out of many different types of materials most notably ivory, bone, wood, and sometimes metals even gems. You can find many different types represented for collecting if you’re in the mood to start a collection.

There are of course rules now in place for import and especially for ivory and so it would be in your best interest to read about these if you were into collecting these types of materials.

You would also need very deep pockets if you’re in the mood to collect any ivory carving of a netsuke that is original and truly early Japan. However there are many other materials that can be easily obtained and the carvings are just as beautiful.

Some research on your part would be advised if you want to peruse this fine art collectable. One resource that I would recommend to start with would be the International Netsuke Society http://www.netsuke.org from there you can find other resources and items of interest.

You can simply do a search for netsuke articles in goggle and come up with a lot of sites of great interest.

Here is a url to a fine article about netsuke and colleting that I think anyone interested in this art form as a hobby should read.

http://www.robynbuntin.com/Articles/netsuke_article_files/netsuke_article.htm

There are of course many fine books on the subject as well and anyone interested can certainly begin to get educated on what to look for and how to collect.

Thanks, for reading and looking. Harold Yearout

©Copyright 2005 All Rights Reserved
For more information feel free to Contact me:

Tuesday, May 10, 2005


This is Serrisa Foetida and is being trained in Shohin style, the plant is three years old.
Posted by Hello

Serissa Foetida or Tree of a Thousand Stars

This material gets its name from the really foul smell of its bark and the latin term Foetida means something foul smelling like rotten meat for example.

This material is subtropical and sometimes is still called by its old Latin name of Serrisa Japonica. There are many varieties of Serrisa some have pink flowers and others have white.

And you can now find many cultivars of this material available in many nurseries through out the western world. The Origin of Serrisa is China and also they are from Japan.

Although they are often times offered in many garden centers and bonsai shops you will most of the time only find smaller plants or starts, it is rare to find an older specimen plant of this material.

The Serissa is perhaps not the best choice for a beginner because it does require that your pretty vigilante in its care. Therefore it is better left to the more experienced hobbyist.

The Serrisa does like to dry out between watering and you will never want to let the compost completely dry out altogether. This plant will quite often loose many leaves that will suddenly turn yellow for what seems no apparent reason.

However experienced bonsai growers know there is always a reason behind these kinds of things happening and will certainly research the problem if they do not know what the cause is.

Most often the reason for this happening is over watering. I have stated many times before and will state it over again that watering of nearly any bonsai is very critical.

Until you learn what each species habits are and what they will require of you for upkeep you may loose a few plants simply to the learning process.

But practice makes perfect and you’ll eventually get it right for all of your plants if you’ll only continue on a stead fast path and keep on trying. If the leaves are brown and crisp then you are not watering enough.

A good rule of thumb for a beginner is to use the chop stick method until you learn. The chop stick method as I call it simply means to buy some cheep wooden chops sticks.

Then place one of these chop stick in each of your plants and always push the chop stick clear to the bottom of the pot.

Then simply raise the chop stick out of the pot daily and observe at what level on the wood that dampness occurs and that should help to give you and idea of how far down into the soil your plant is still moist.

Also placing the plant on a humidity tray will help to insure a good level of moisture around your plant. You will want to feed your Serrisa from early spring around April through September and then you can slack off.

But be careful to insure that your plant is wet when you do feed it as the fertilizers will often times burn the delicate roots; also you will not want to fertilize your plant if it has been suffering from leaf drop.

Serrisa hate root pruning so use vigilance and be careful when you decide to repot your plant. Repotting can be carried out about every third year or so.

You will want to let your Serrisa stay out doors for the summer if possible this will only help to keep your plant more healthy and induce a better canopy of growth.

In most regions the time of the year to move it out doors will be around June and then bring it back inside when it really warms up in August.

You can get starts from soft wood cuttings taken from a mother plant in spring and early summer. Your rooting will certainly be a lot more successful if you can provide bottom heat.

The Serrisa will respond well to nearly any style of bonsai with the exception of the formal upright and you can also be very successful with the clip and grow method of bonsai since this plant tends to really produce an abundance of limbs giving you more choice for positioning.

I have included here above this article a picture of a tiny Shohin Serrisa that I started about three years ago and this plant will remain in training for many years before it will be a nice bonsai.

But you have to start some where and this is yet another one of my attempts at creating a Shohin bonsai.

Serrisa have very small trunks and a thick trunk will take years to grow and if you do find one that has a thick trunk then this would surely indicate that the plant is very old.

No bonsai will ever look really good until you have cultivated it for many years.

The training process for any bonsai takes patients and time and many years to develop a really nice stunning plant.

Anyone with deep enough pockets could simply go out and purchase a nice specimin bonsai but would you really appericate it as much as one you have created and grown to perfection yourself.

I think not.... but when you have finally created your own wonderful Living Bonsai you’ll know it and then and only then will you really have reaped your full reward for all the time you have vested.

Thanks for reading and looking, Harold Yearout

©Copyright 2005 The Living Bonsai All Rights Reserved
For more information feel free to Contact Me: